Every quest needs gear—and when you shop through our links, you help keep the adventure alive.
As an Amazon Associate, FeatherQuest earns from qualifying purchases.
The Exact Setup I Use
This is not a giant guide to every spotting scope setup on the market. It is simply the exact setup I use and recommend because it works for me. I still grab my camera when I want the best image possible, but this setup has been a surprisingly fun and useful way to share birds, record quick videos, and grab a few simple digiscoping shots.
I put off getting a spotting scope for years. The more I use it, the more I wish I would have added one sooner — it opens up a completely different side of birding that binoculars and even most camera setups just can’t reach.
My First Real WinOnce the setup clicked, it stopped feeling fiddly and started feeling fun.
Quick Start: Scope, Mount, Tripod
🔭
Spotting Scope
A sharp, bright scope is the heart of the system. I use the Vortex Viper HD 20–60x80 angled scope.
📱
Phone Mount
A MagSafe-style mount makes alignment faster, cleaner, and much more enjoyable than a clamp-style setup.
🦾
Tripod
A sturdy tripod with a smooth head matters more than people think. Stability and ease of use make the whole system better.
My Recommended Setup
Vortex Viper HD 20-60x80 Spotting Scope - Angled
This is the exact scope I use. It’s an older Viper HD model, but in real-world use it performs extremely well. Right now it’s a fantastic deal — likely being cleared out as newer models replace it. If you can still find this version in stock, I would not hesitate.
This is the newer Vortex Viper HD model and offers slightly more. If you want the latest version, this is the current model — just be aware pricing is often higher than local outfitters.
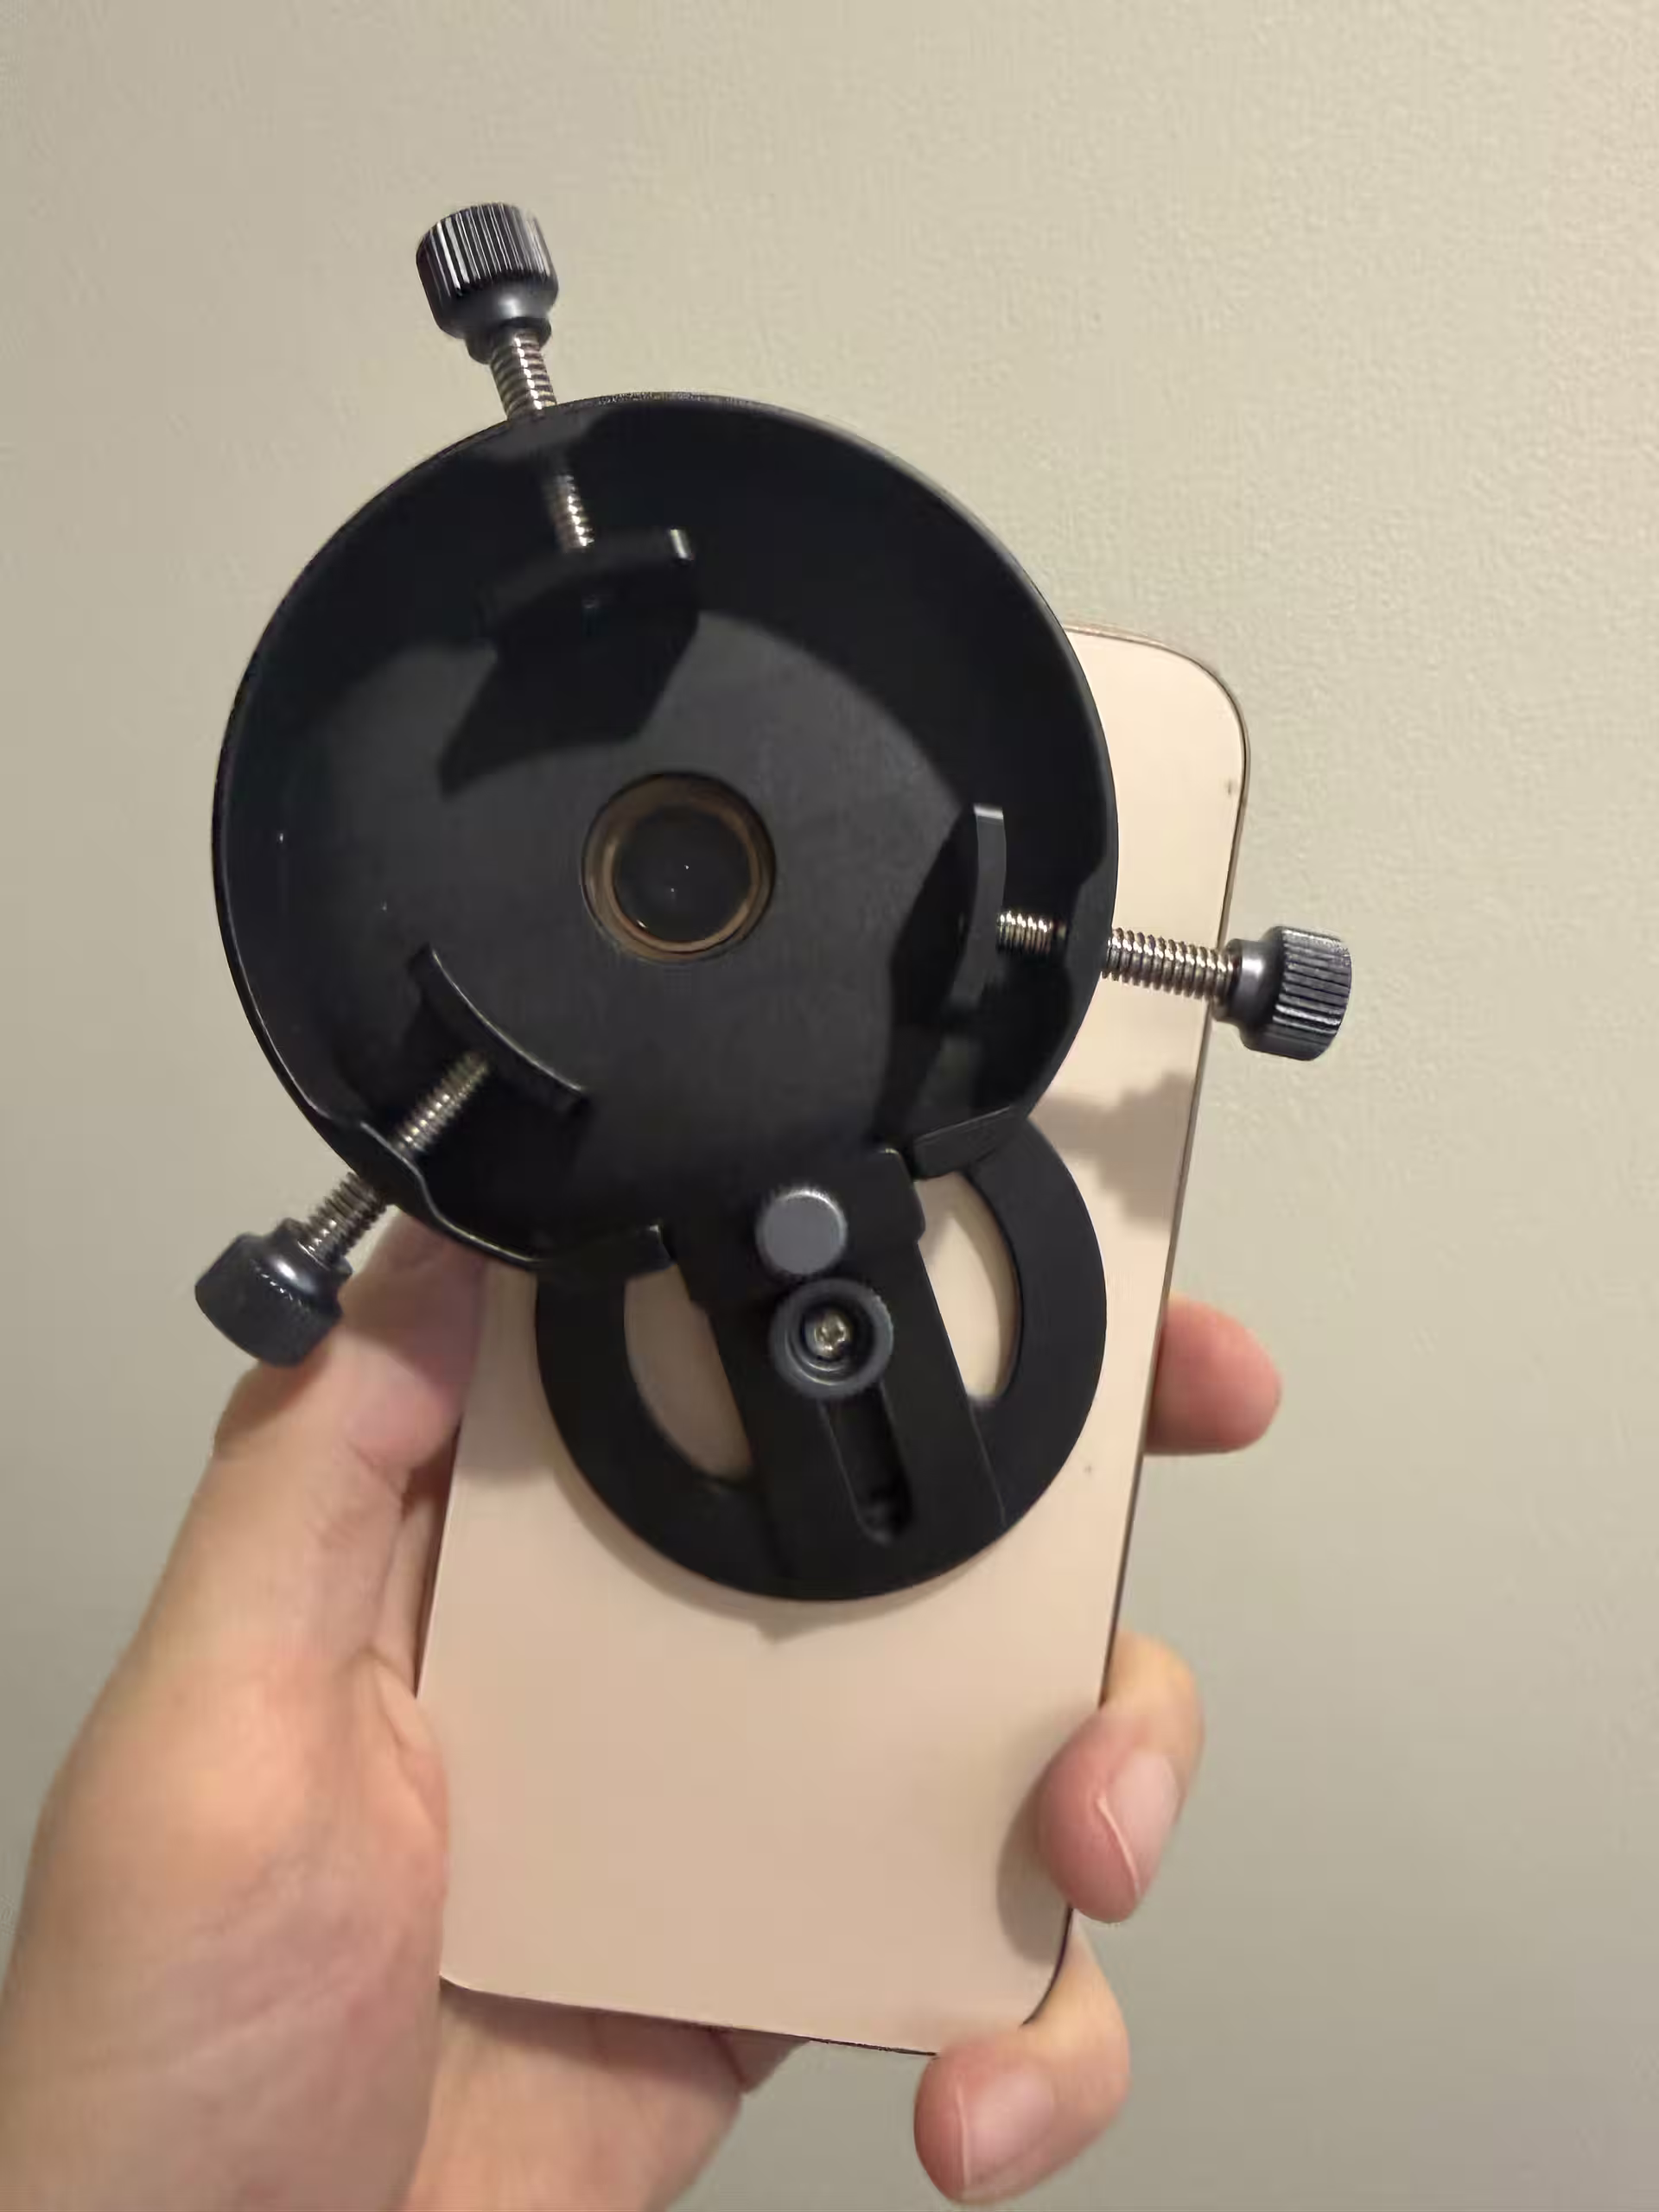
This is the exact phone mount I use. I chose it for three reasons: it uses a magnetic mount instead of a clamp, the shield helps block glare while making it easier to line up the camera, and the vertical adjustment lets you fine-tune the phone’s distance from the scope. I do wish the vertical adjustment had a little more range, but overall this is the mount that finally made the setup click for me.
If you're just getting started, I wouldn't hesitate to start here. It’s affordable, easy to use, and good enough to get your setup working. Just know the head isn’t super smooth, so tracking birds can feel a little clunky at times.
If you know you’re going to use this setup a lot, this is the upgrade. The smoother pan head makes a big difference when tracking birds and fine-tuning your framing.
The mount is the part that changed everything for me. My first attempt failed, and that taught me quickly that the little details matter. This one worked because it removed friction instead of adding more of it.
The magnetic mount is much easier to work with than a clamp. It snaps on quickly and does not squeeze the buttons on my phone.
The shield helps block glare and makes it easier to perfectly line up the camera over the eyepiece.
The vertical adjustment gives you a little control over how far the phone sits from the scope. I still wish it had slightly more range, but it is a very useful feature.
When attaching the mount to the eyepiece, tighten the three adjustment screws evenly — turning each one the same amount (one rotation at a time in a circle). This helps guide the mount straight onto the eyepiece instead of pulling it off-center.
Why This Mount Won Me OverMagnetic, easier to align, and far more enjoyable to use in the real world.
Generally, I still reach for my camera first when I want the best image. But this setup has become its own lane. It is great for backyard birds, quick videos, helping other people see what I am seeing, and creating simple content without a big production.
For a lot of birders, this is actually the go-to setup — especially when heading out to larger lakes, reservoirs, or open water where birds are simply too far away for binoculars or even most camera lenses. That is where a spotting scope really shines, and adding a phone just makes it even more useful.
That is the real reason I recommend this exact setup. Not because it is the only way to do it, but because it is the one that took the least friction for me to actually enjoy using.
One thing I did not expect is how much this setup changes the experience itself. Because everything is on a tripod, it naturally forces you to slow down and be still. You are not holding anything steady or rushing to keep the bird in view — you just settle in. And after a minute, the birds start filling in around you.
Seeing It TogetherThe real magic is being able to show someone else exactly what you're seeing in the moment.
Quick Tips That Help
If your screen goes black when mounting the phone, try toggling the macro mode (little flower icon) on and off, or switch briefly to video mode — this usually helps the camera lock focus again.
Use the vertical adjustment knob on the mount to fine-tune the distance between your phone lens and the scope. Small changes here can make a big difference.
If you’re seeing vignetting (dark edges) when zooming, double-check that the mount is perfectly centered on the scope eyepiece (not just the phone). Once it’s truly centered, you can often zoom the scope all the way in and out without needing to readjust.
A Simple Setup That Works
This is the simple version: if you want to know exactly what I use and why, this is it.
A good scope, a mount that removes friction, and a tripod you trust can go a long way. Once it clicks, it gets fun fast.
Recording Through the ScopeSimple video captured through my spotting scope + iPhone — steady, close, and surprisingly fun to use.