I started taking better bird photos — and suddenly my digital copies were not enough.
I had already built a canvas gallery wall for our family photos and fell in love with the look of many images living together. But bird photography felt different. These photos evolve constantly as skills improve, lifers appear, and better images replace older ones.
Canvas was beautiful — but permanent.
I wanted something flexible. Something that could grow as my photography did.
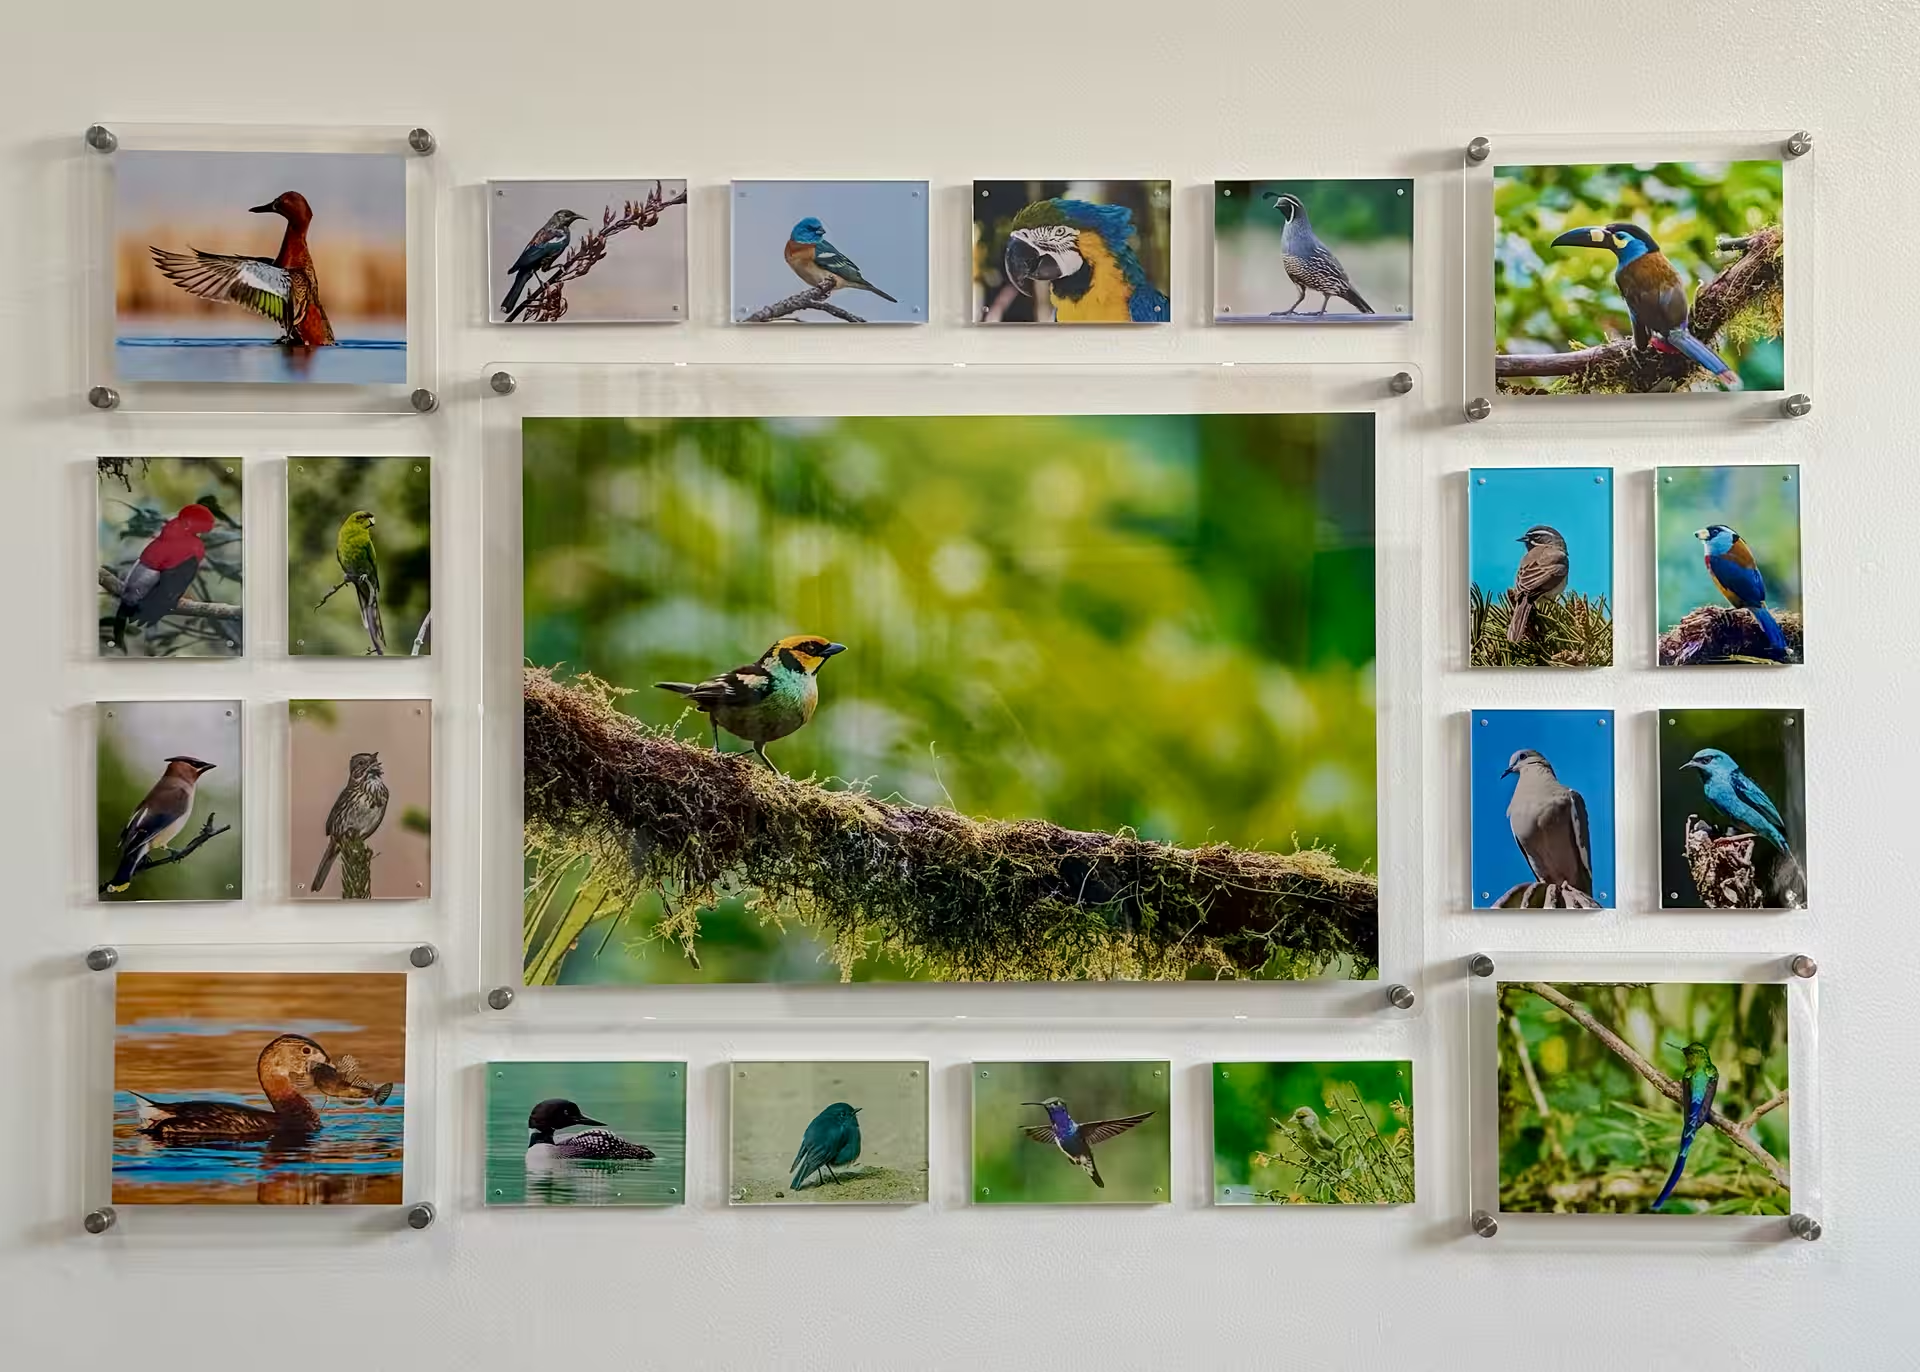
Before getting into the details, here’s what the wall looks like once everything comes together.
A Living Photo WallThe layout stays fixed while the photos rotate as seasons, skills, and stories change.
Quick Start: Imagine, Prepare, Compose
🧠
Imagine
Start simple — sketch the layout on paper or mock it up on your computer. Ask a few key questions: Where will your hero image live? Which birds do you want to showcase? Thinking this through first makes the wall feel intentional instead of improvised.
📏
Prepare
Lay the frames out on the floor to test spacing and balance. Measure wall dimensions and identify your center anchor point before drilling anything.
🪶
Compose
With the anchor in place, begin setting the surrounding frames. Command Strips make placement and adjustments easy. The structure stays fixed — the photos can evolve anytime.
Imagine: Designing the Gallery System
Before anything touched the wall, I spent time thinking through what I actually wanted this gallery to be. Bird photos change quickly — better images replace older ones, new lifers appear, and favorites shift with the seasons.
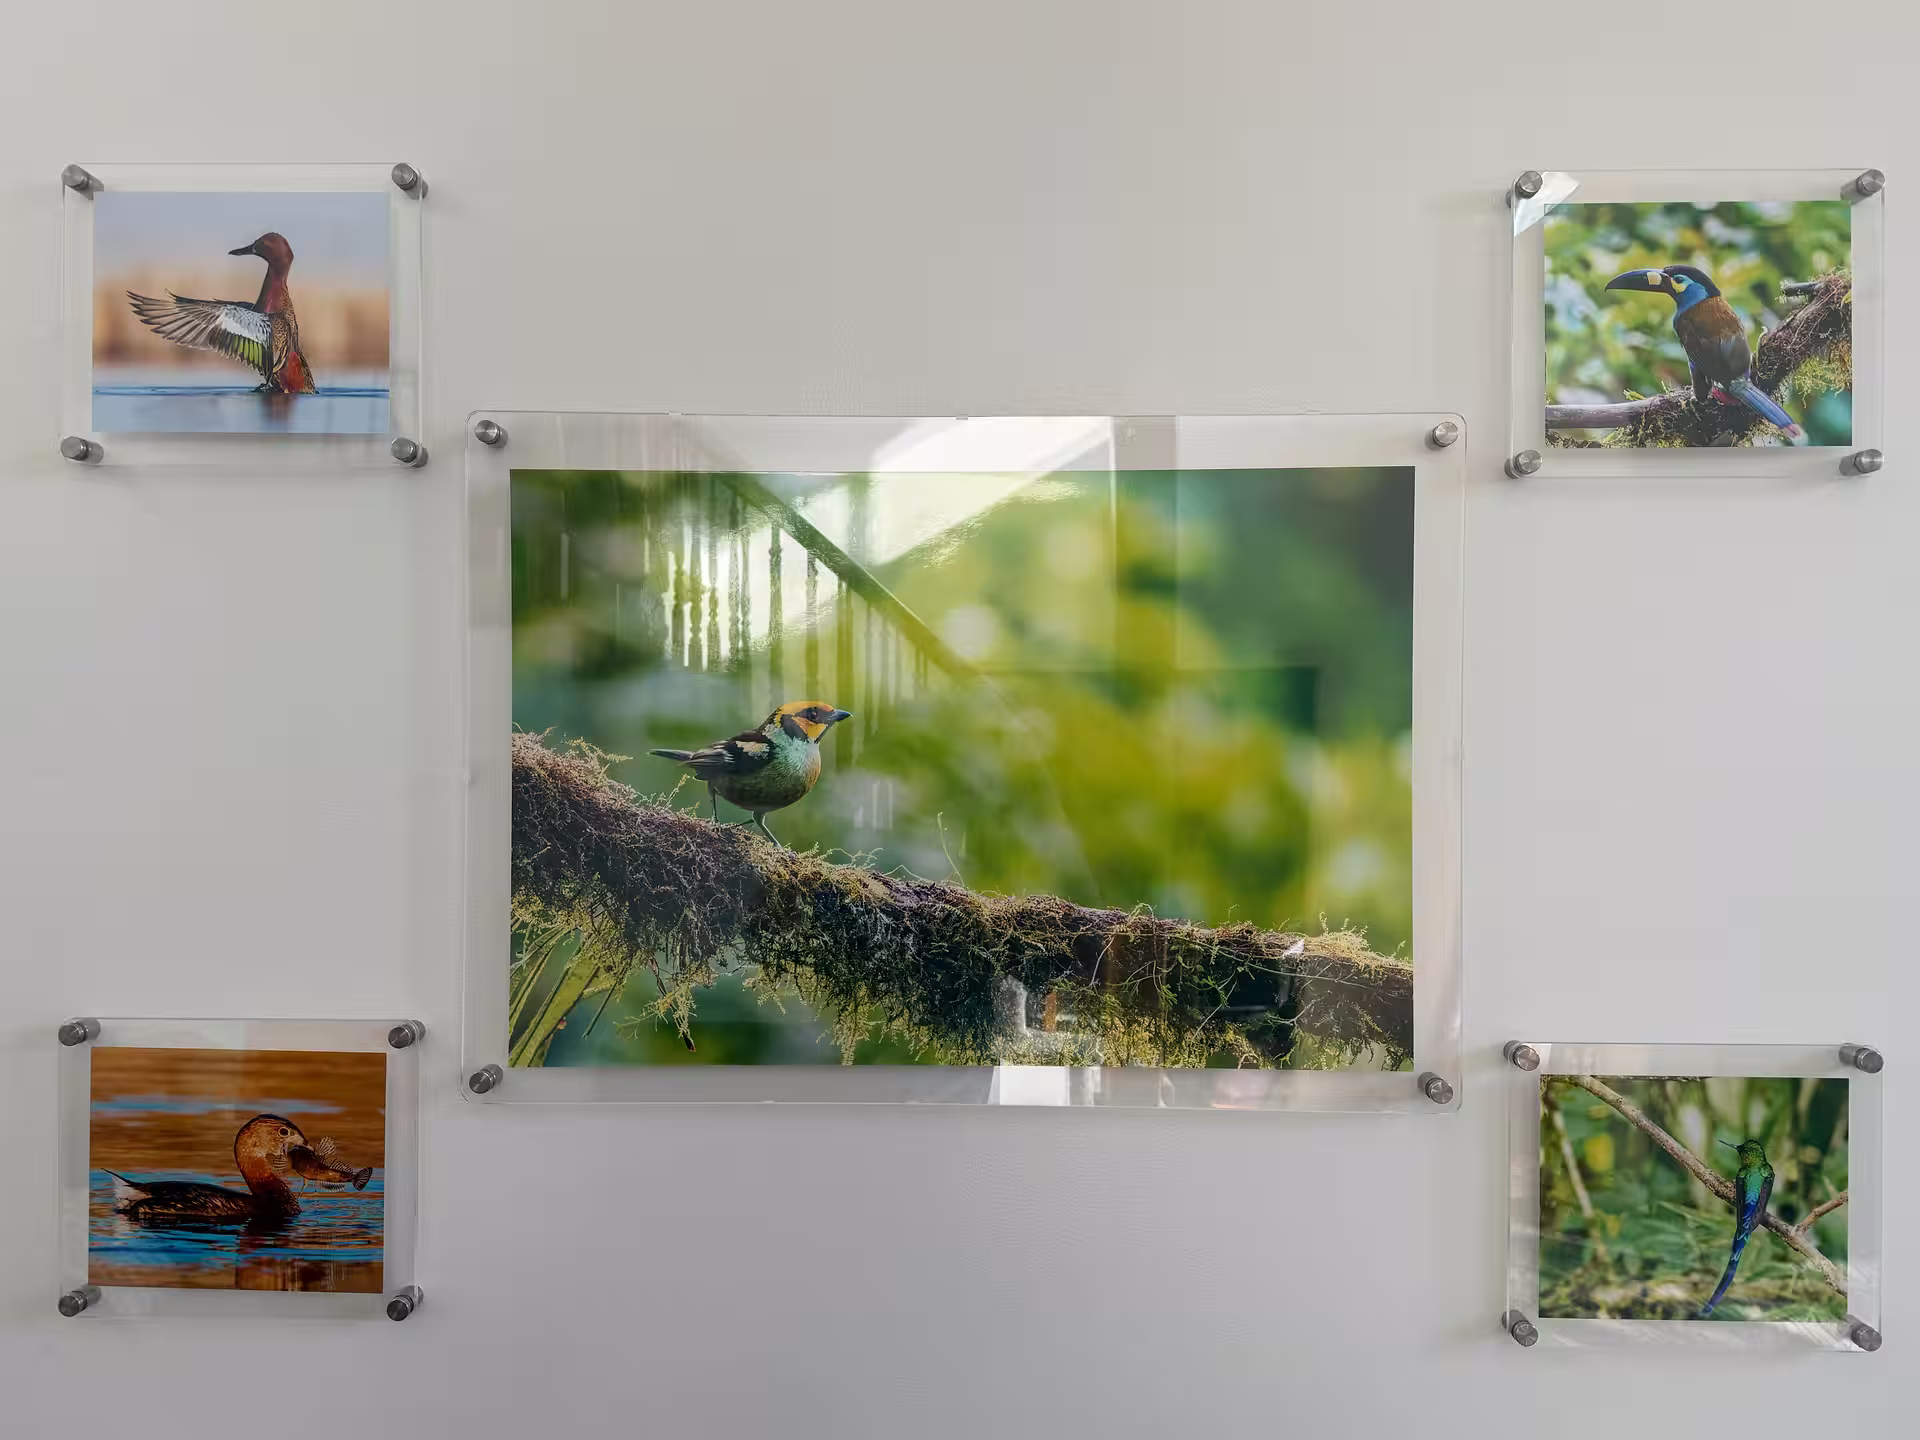
I wanted a system that felt permanent in structure but flexible in content. That search led me to floating acrylic frames — clean edges, visible depth, and a subtle separation from the wall that made the photos feel intentional rather than decorative.
Before committing fully, I ordered a few test frames and printed the same image in multiple finishes to compare how each interacted behind acrylic. Seeing them side by side made the choice obvious: lustre felt flat, gloss added glare, and pearl delivered depth without reflection.
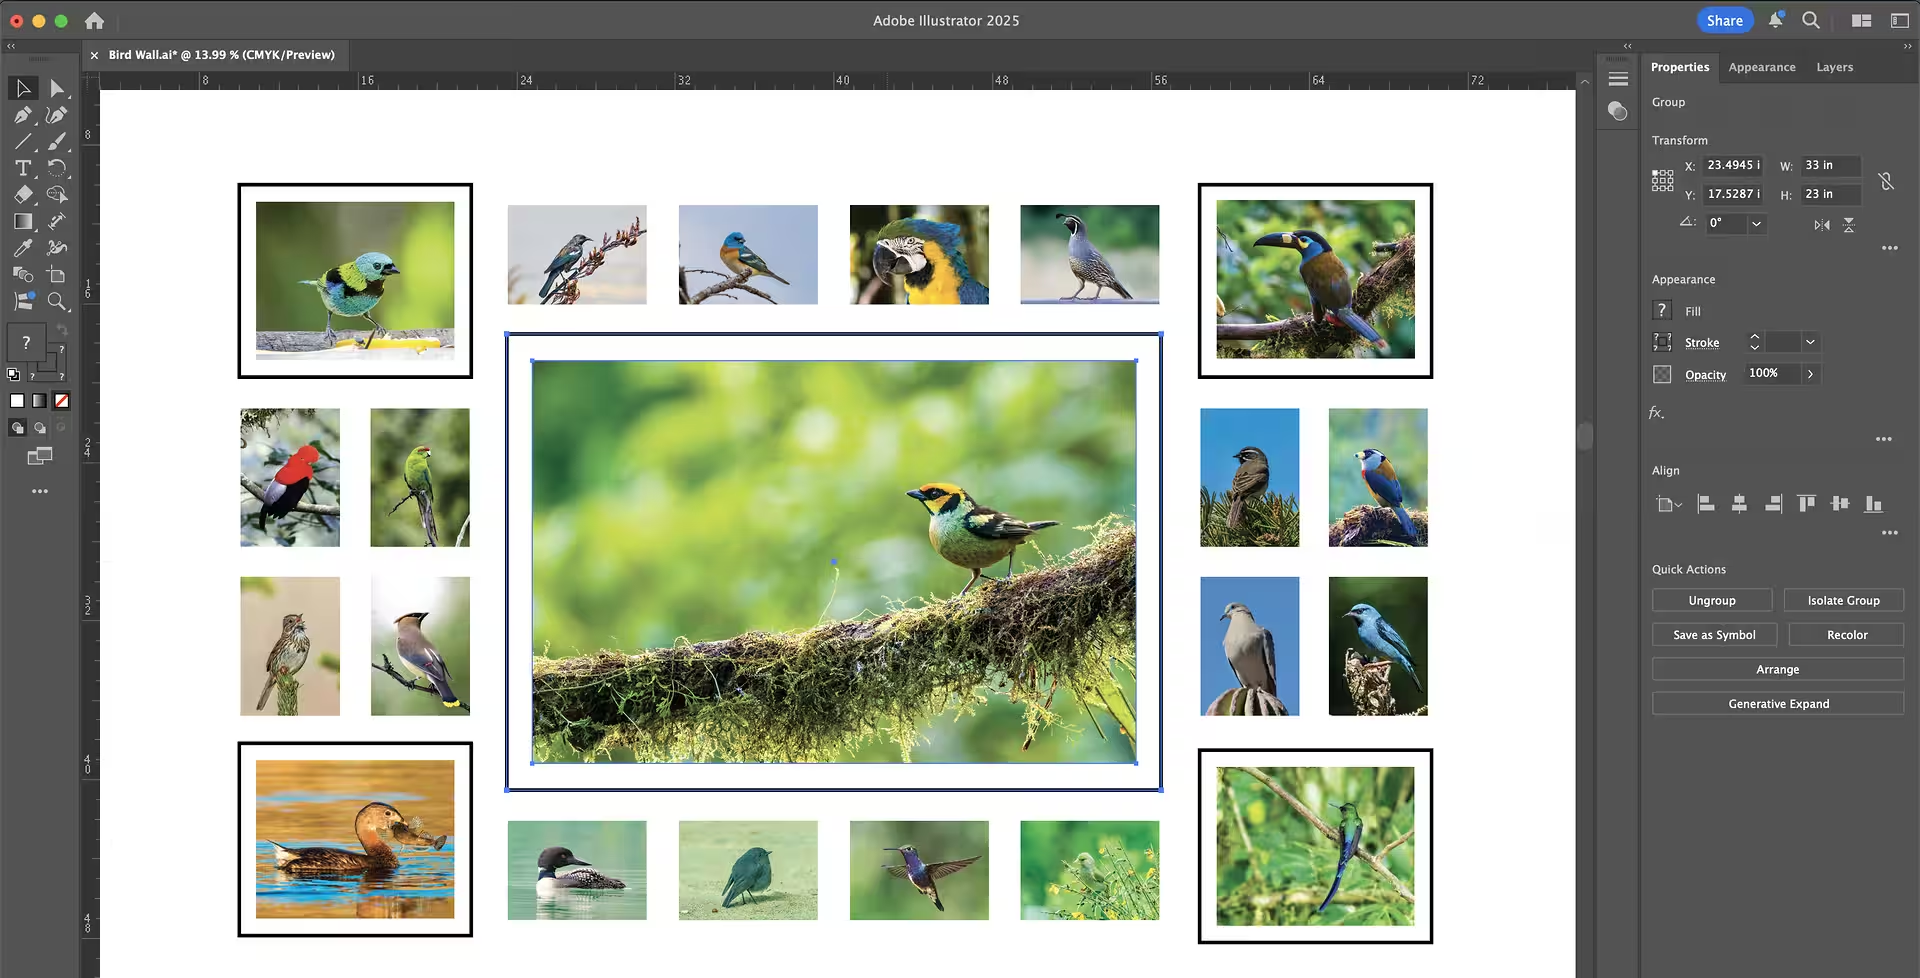
At the same time, I mocked up the entire wall digitally in Adobe Illustrator — testing spacing, symmetry, and hero placement long before drilling anything. That predesign step made it easy to experiment freely and arrive at a layout that felt balanced and calm.
Once the frame style, print finish, and layout were decided, everything clicked. The structure would stay fixed — but the photos themselves could evolve as the story changed.
While I built this wall for bird photography, the same approach works beautifully for any photo set — family portraits, travel memories, or kids as they grow. The idea is the same: create a place where images can live, change, and keep pace with life.
Designing Before DrillingI laid everything out digitally first to dial in spacing and symmetry before touching the wall.
Prepare: Floor Layout & Measurements
With the design decided, this phase is about turning the idea into something measurable. Working on the floor first removes pressure and lets you confirm spacing, proportions, and overall balance before committing anything to the wall.
Lay every frame out on the floor to match your digital layout.
Adjust spacing until the rhythm feels balanced — this is much easier on the floor than on the wall.
Measure the total width and height of the layout.
Mark the center point of the wall — this becomes your anchor reference.
Confirm stud locations or drywall anchor positions before drilling.
Floor Layout PhaseThis step turns the idea into a real, measurable plan before any holes are drilled.
Compose: Building the Wall
This is the moment everything becomes real. Once the center anchor frame goes up, the rest of the wall builds outward with confidence.
A few small decisions made a big difference in how clean and balanced the final wall feels.
Keep consistent spacing between frames. Even small inconsistencies are noticeable with floating acrylic.
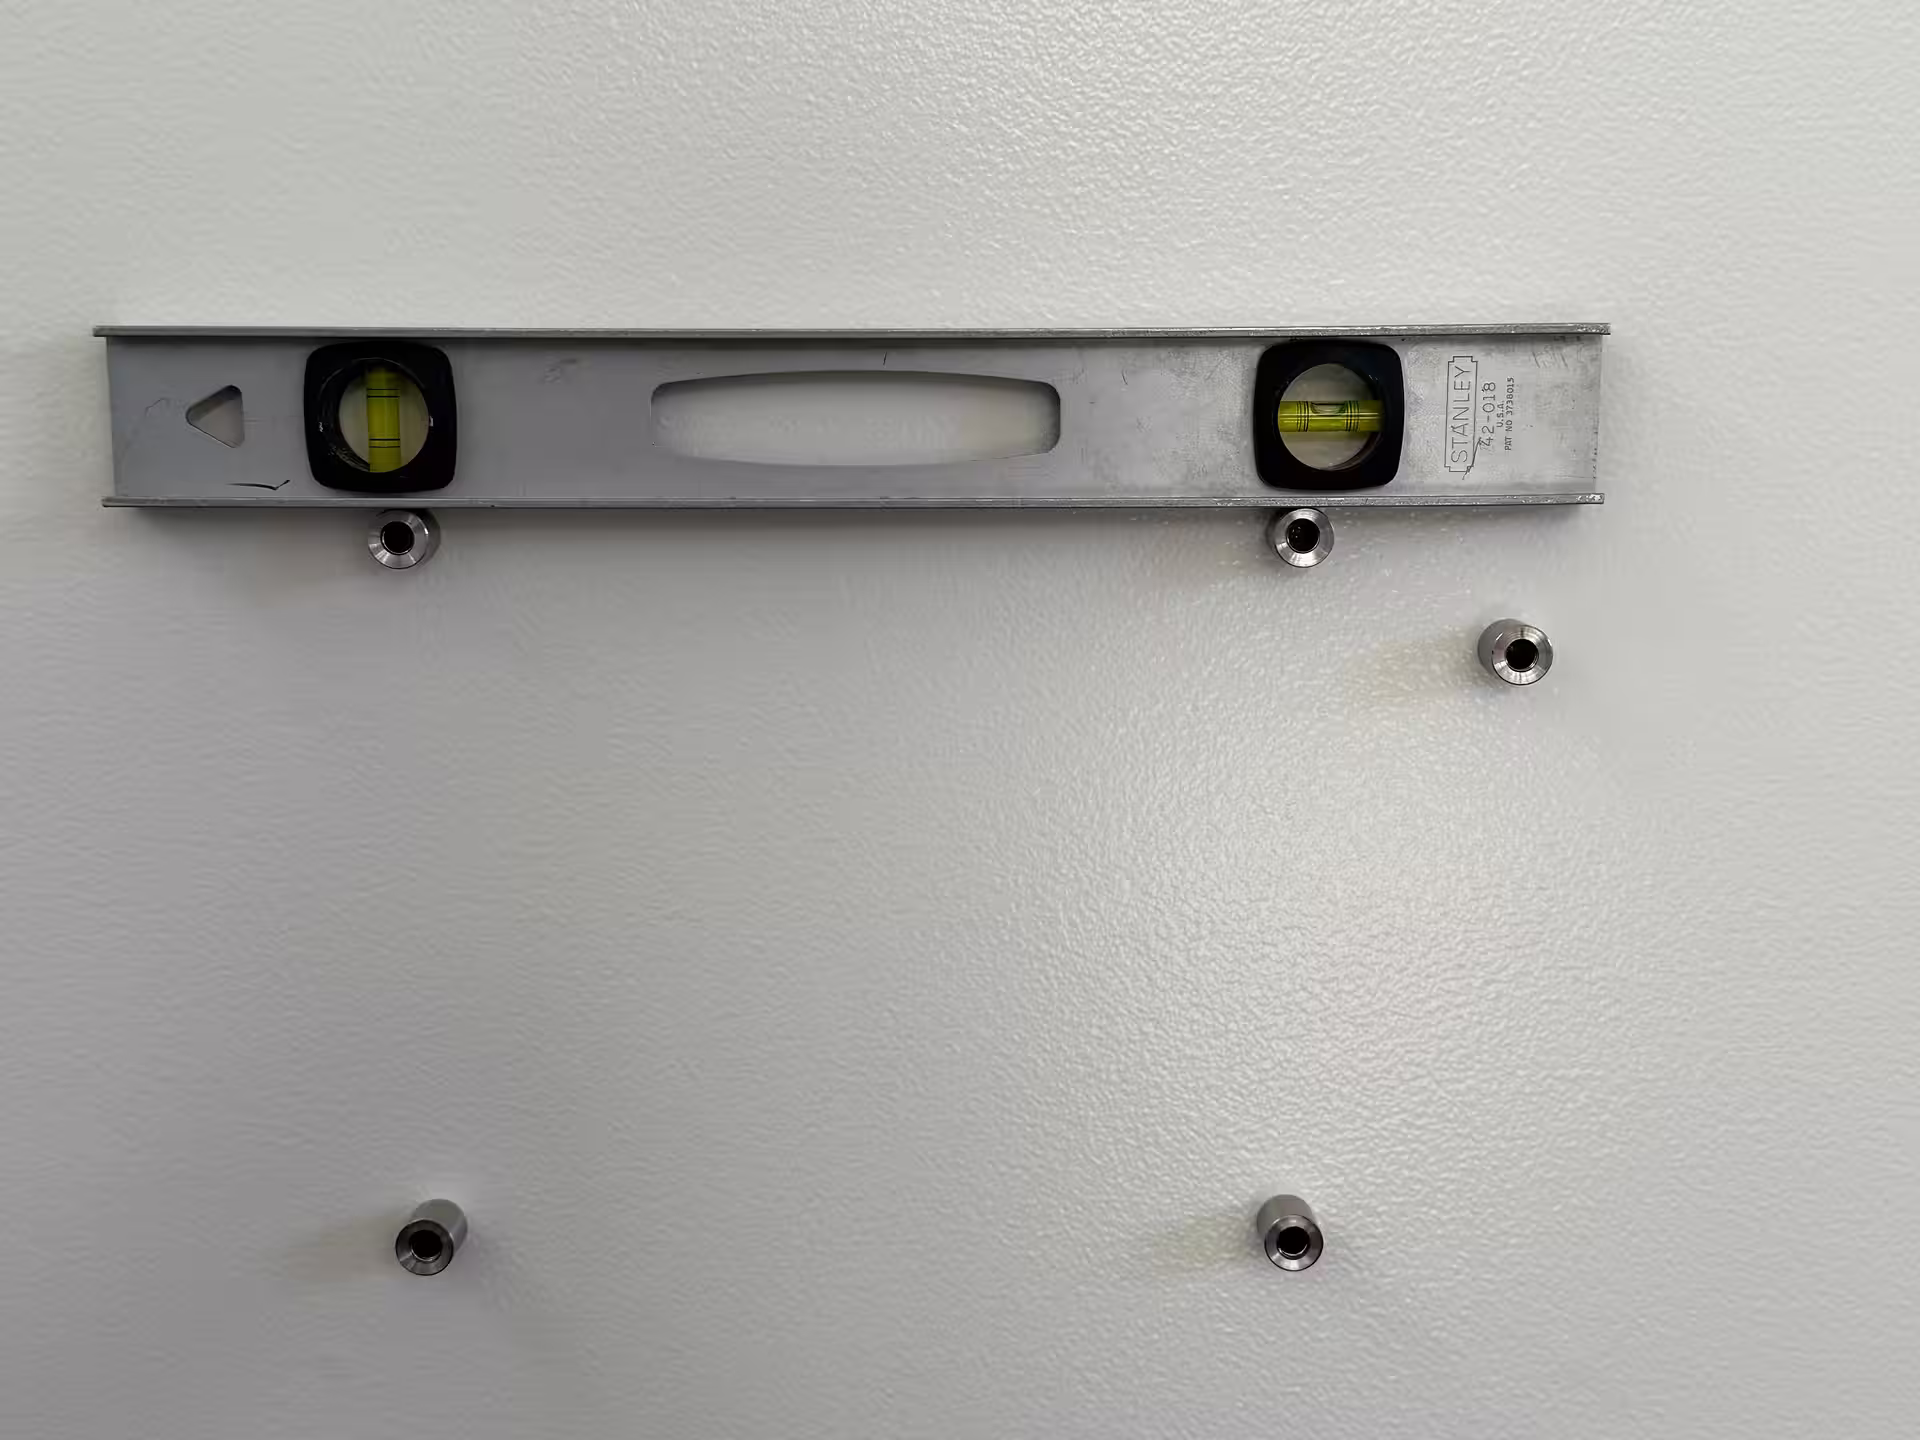
Use a long level or laser level for the top row. Everything else visually references that line.
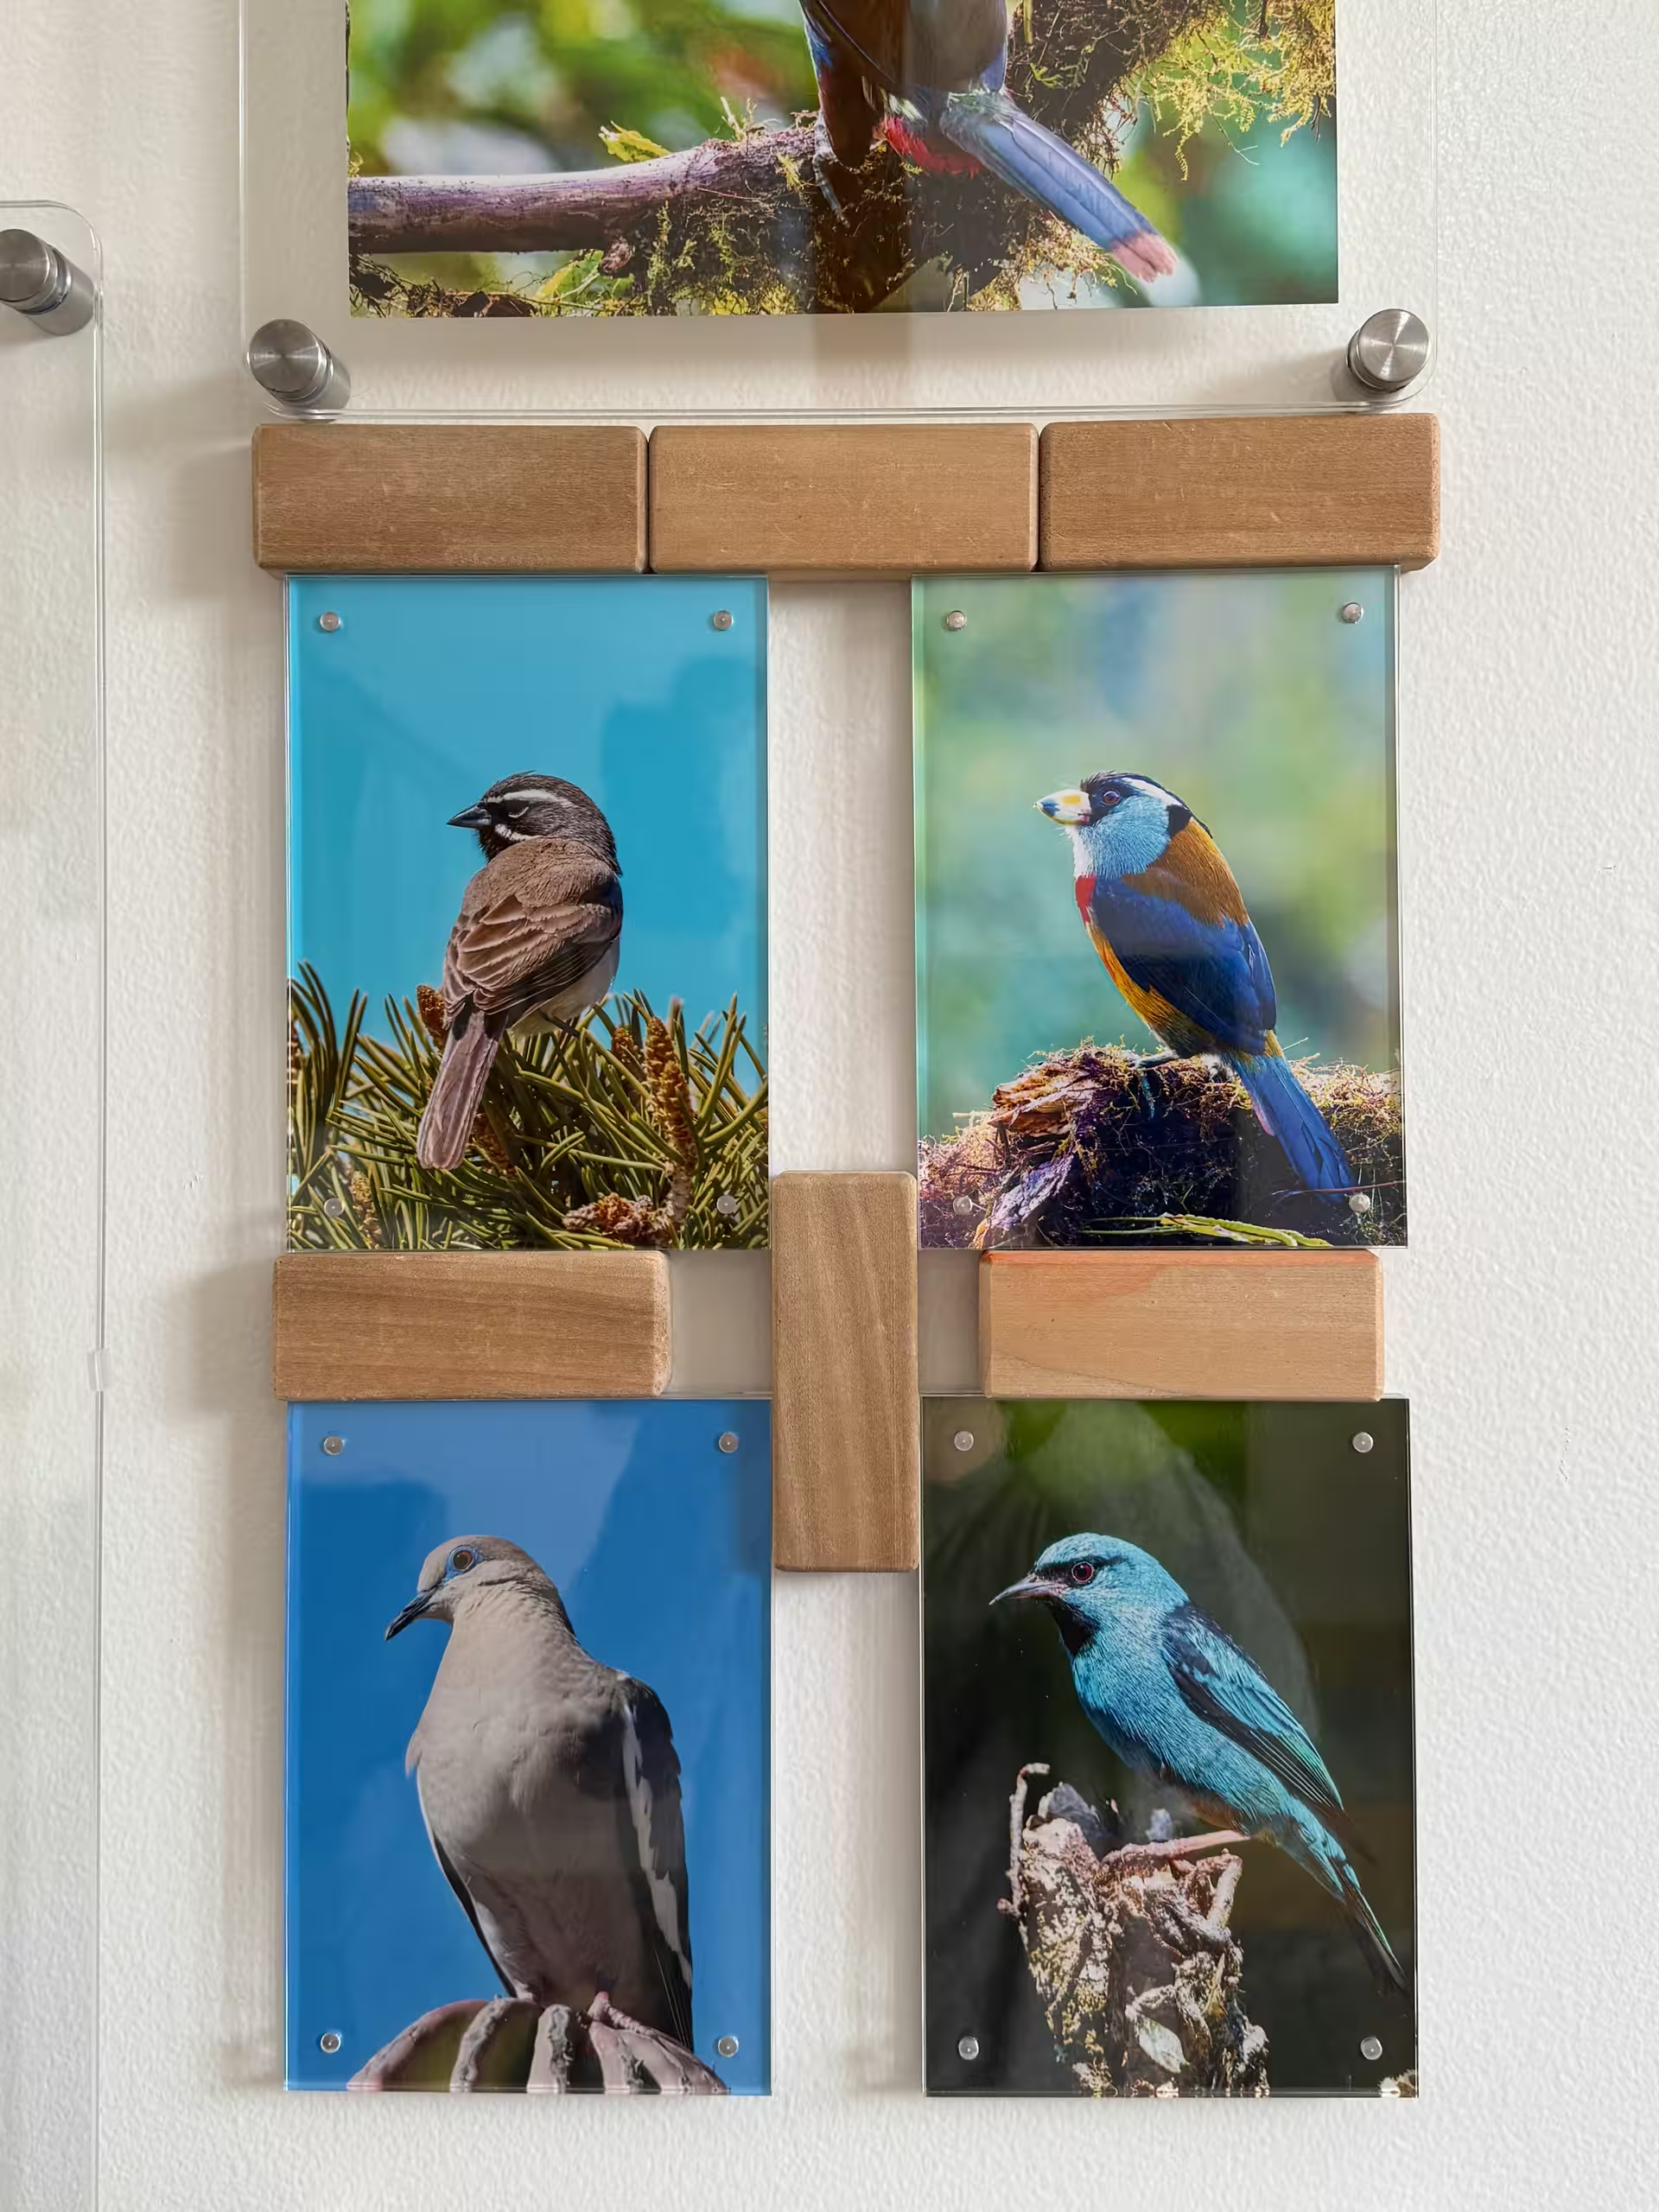
Group similar photo orientations together for visual rhythm.
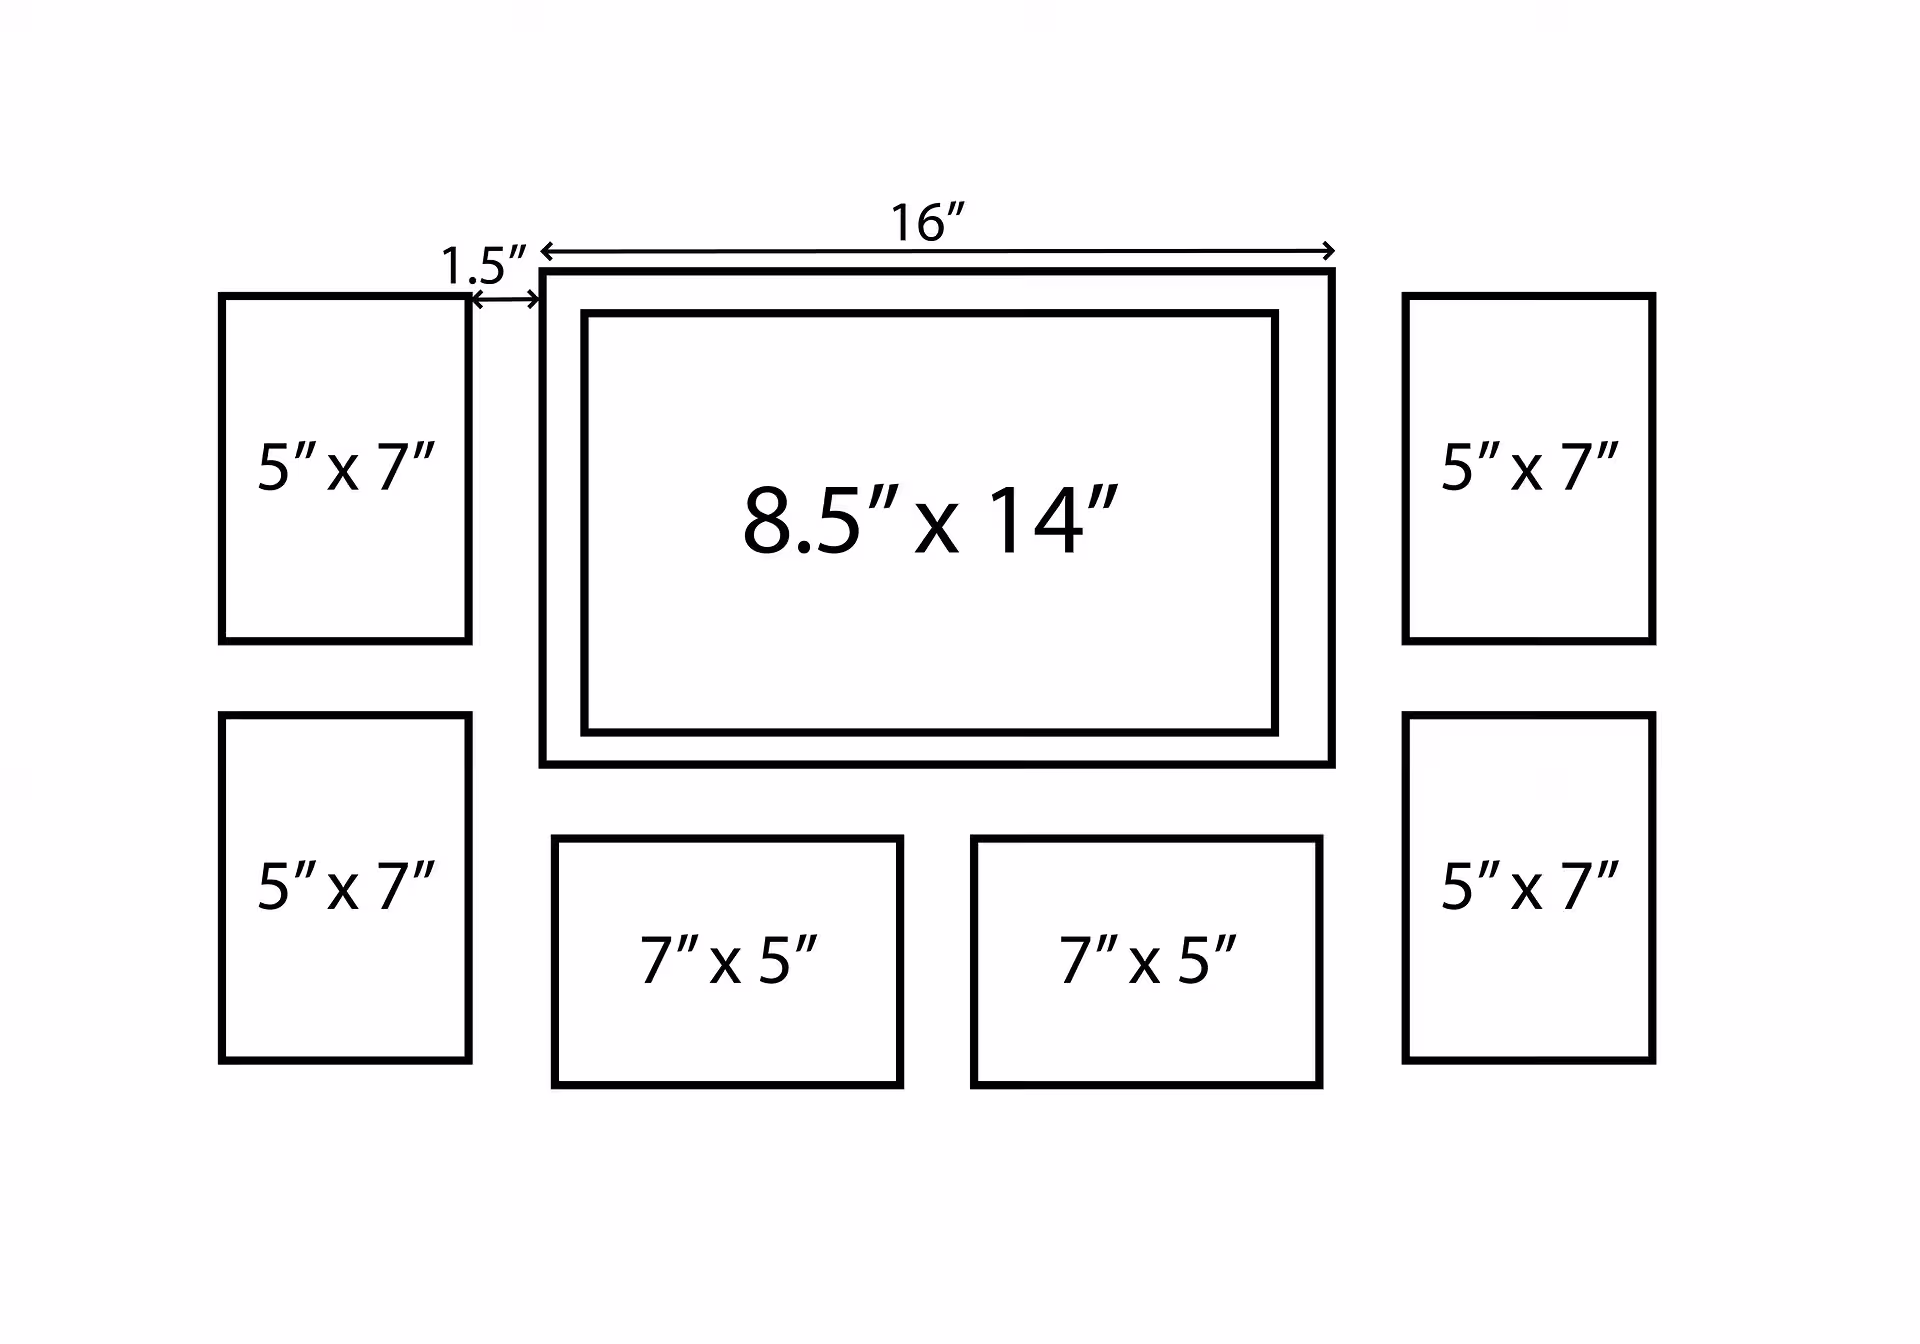
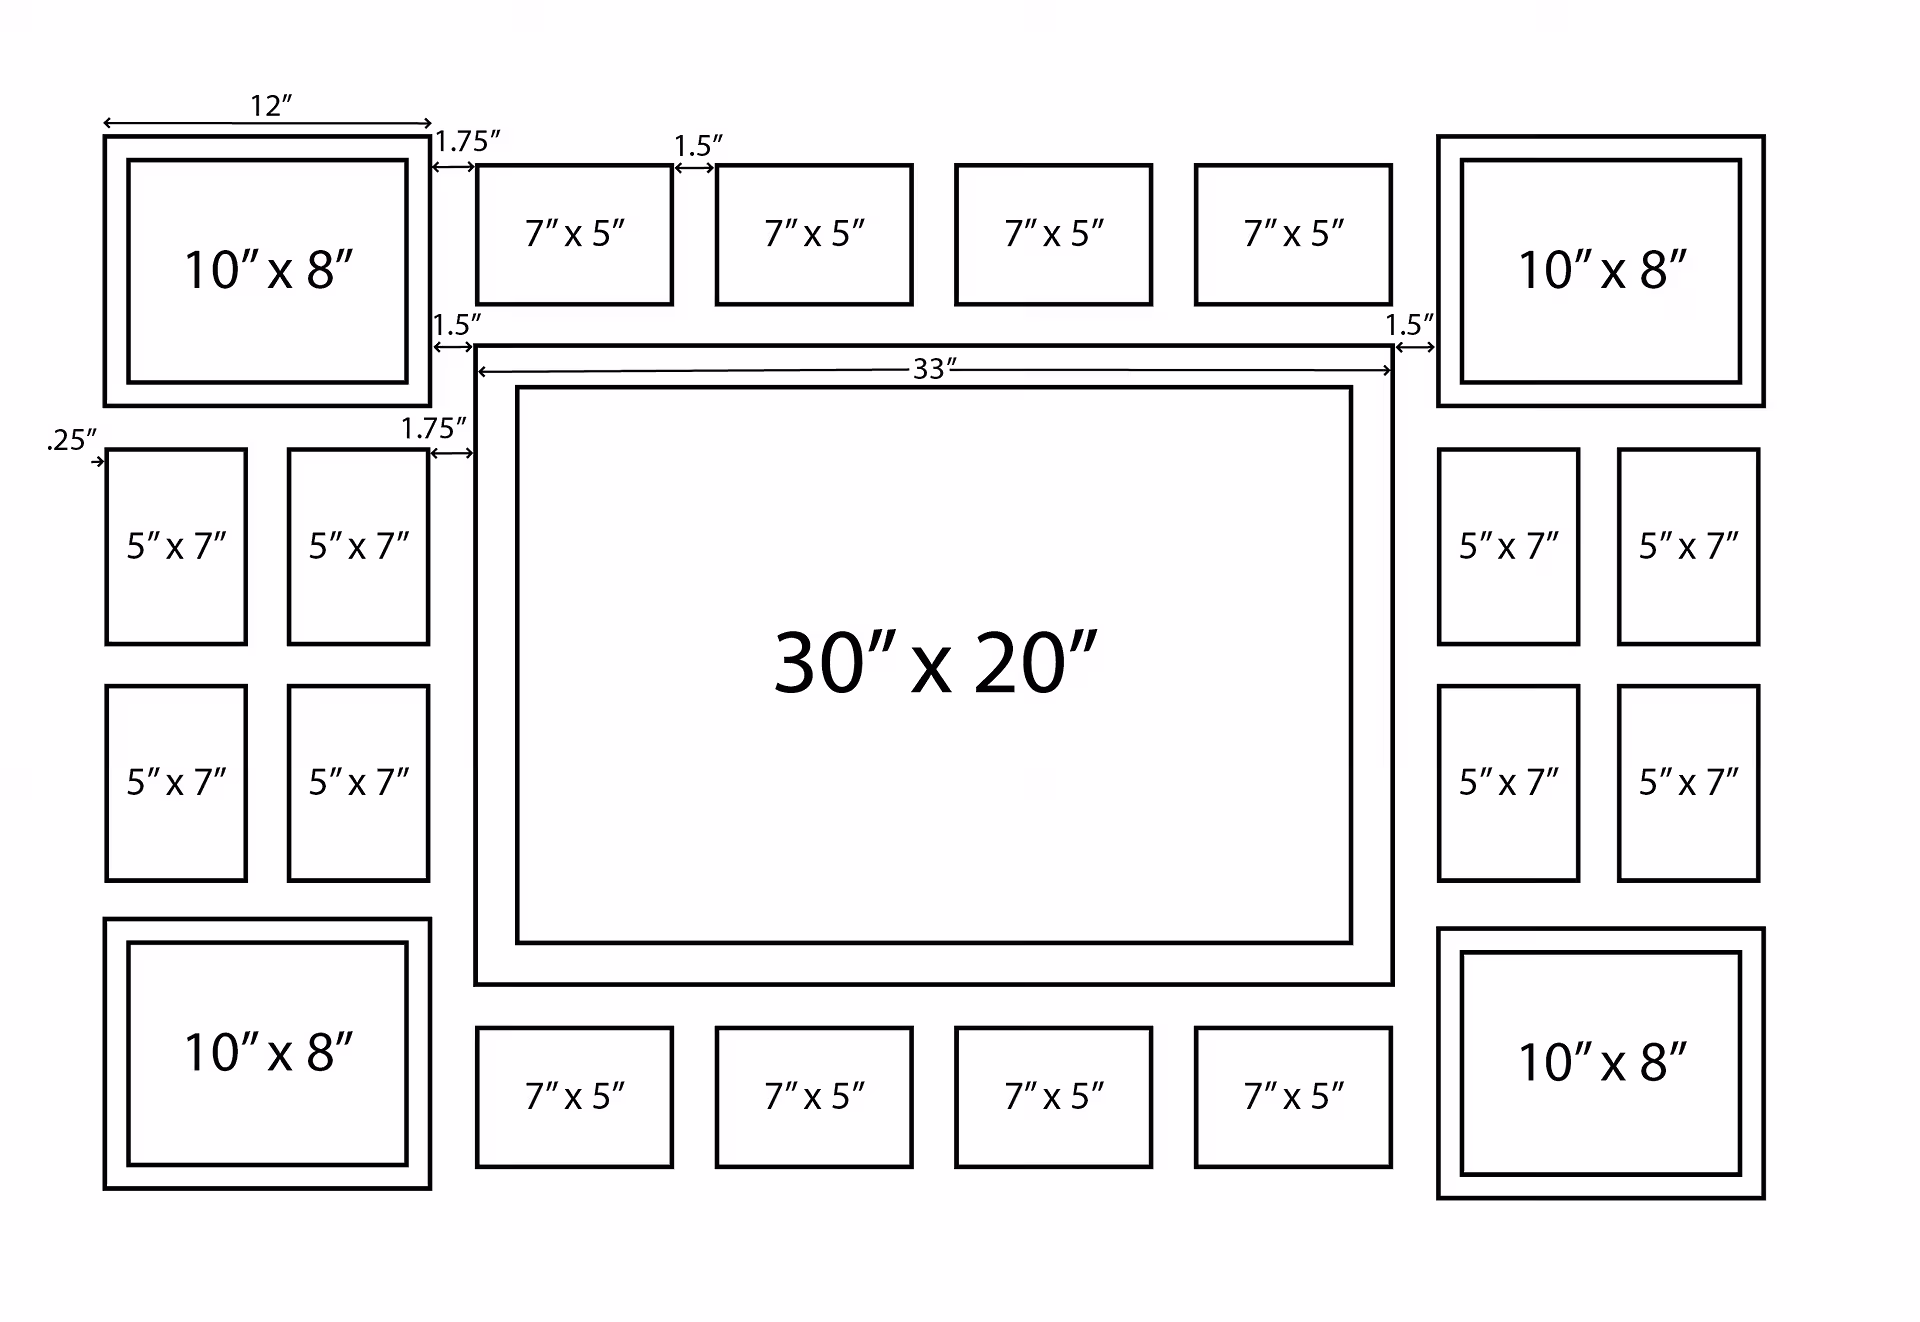
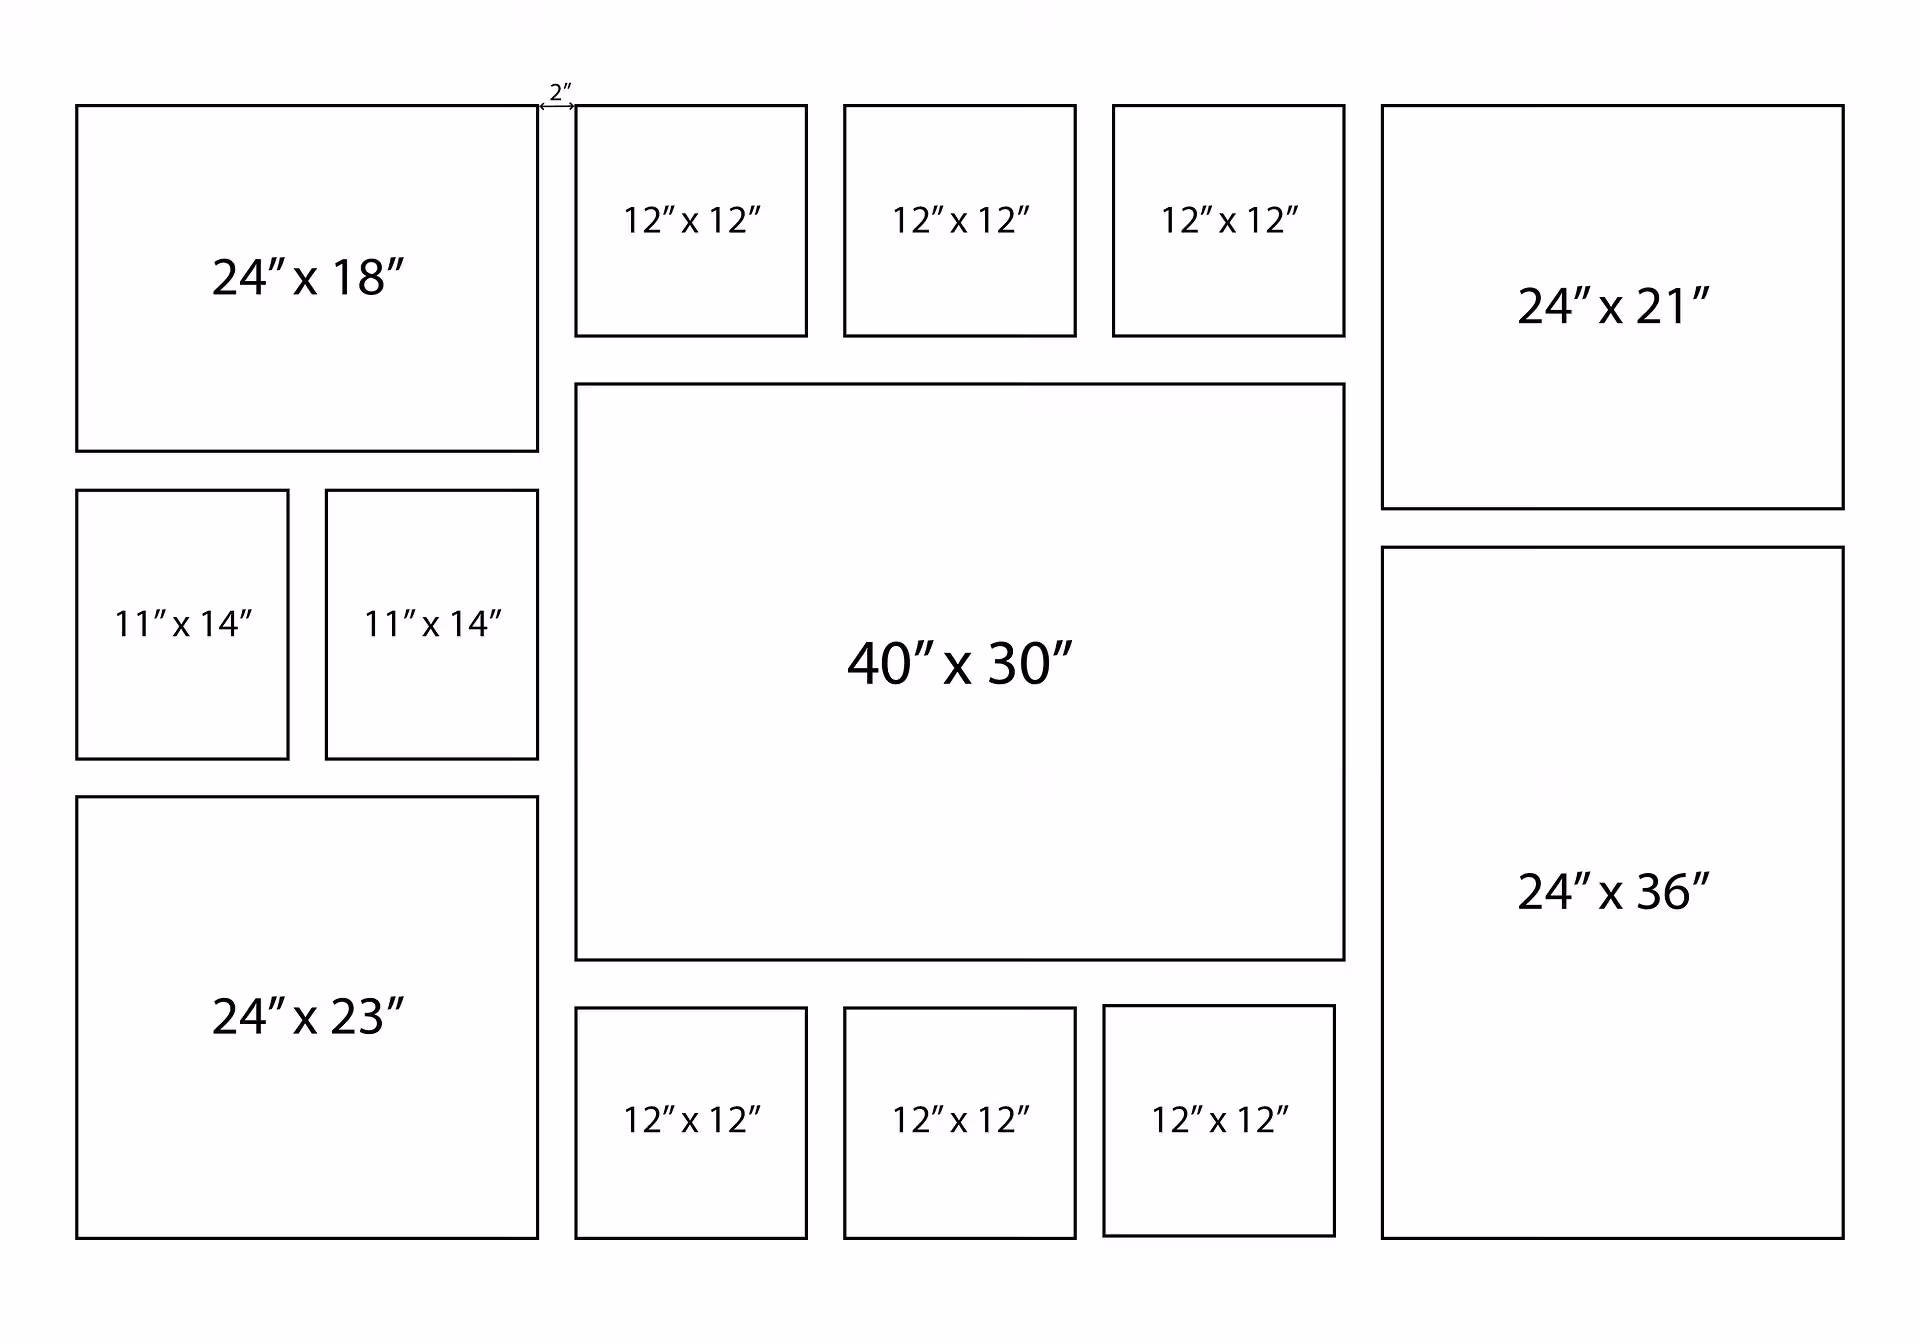
Secret spacing tip: I used 1.5" kids wooden blocks as physical spacers while mounting the frames. It sounds silly, but it made spacing perfectly consistent and removed all guesswork.
The Spacer Trick1.5-inch kids wooden blocks made spacing perfectly consistent and removed all guesswork.
Every quest needs gear—and when you shop through our links, you help keep the adventure alive.
As an Amazon Associate, FeatherQuest earns from qualifying purchases.
Materials & Tools
The Hardware Behind the Wall
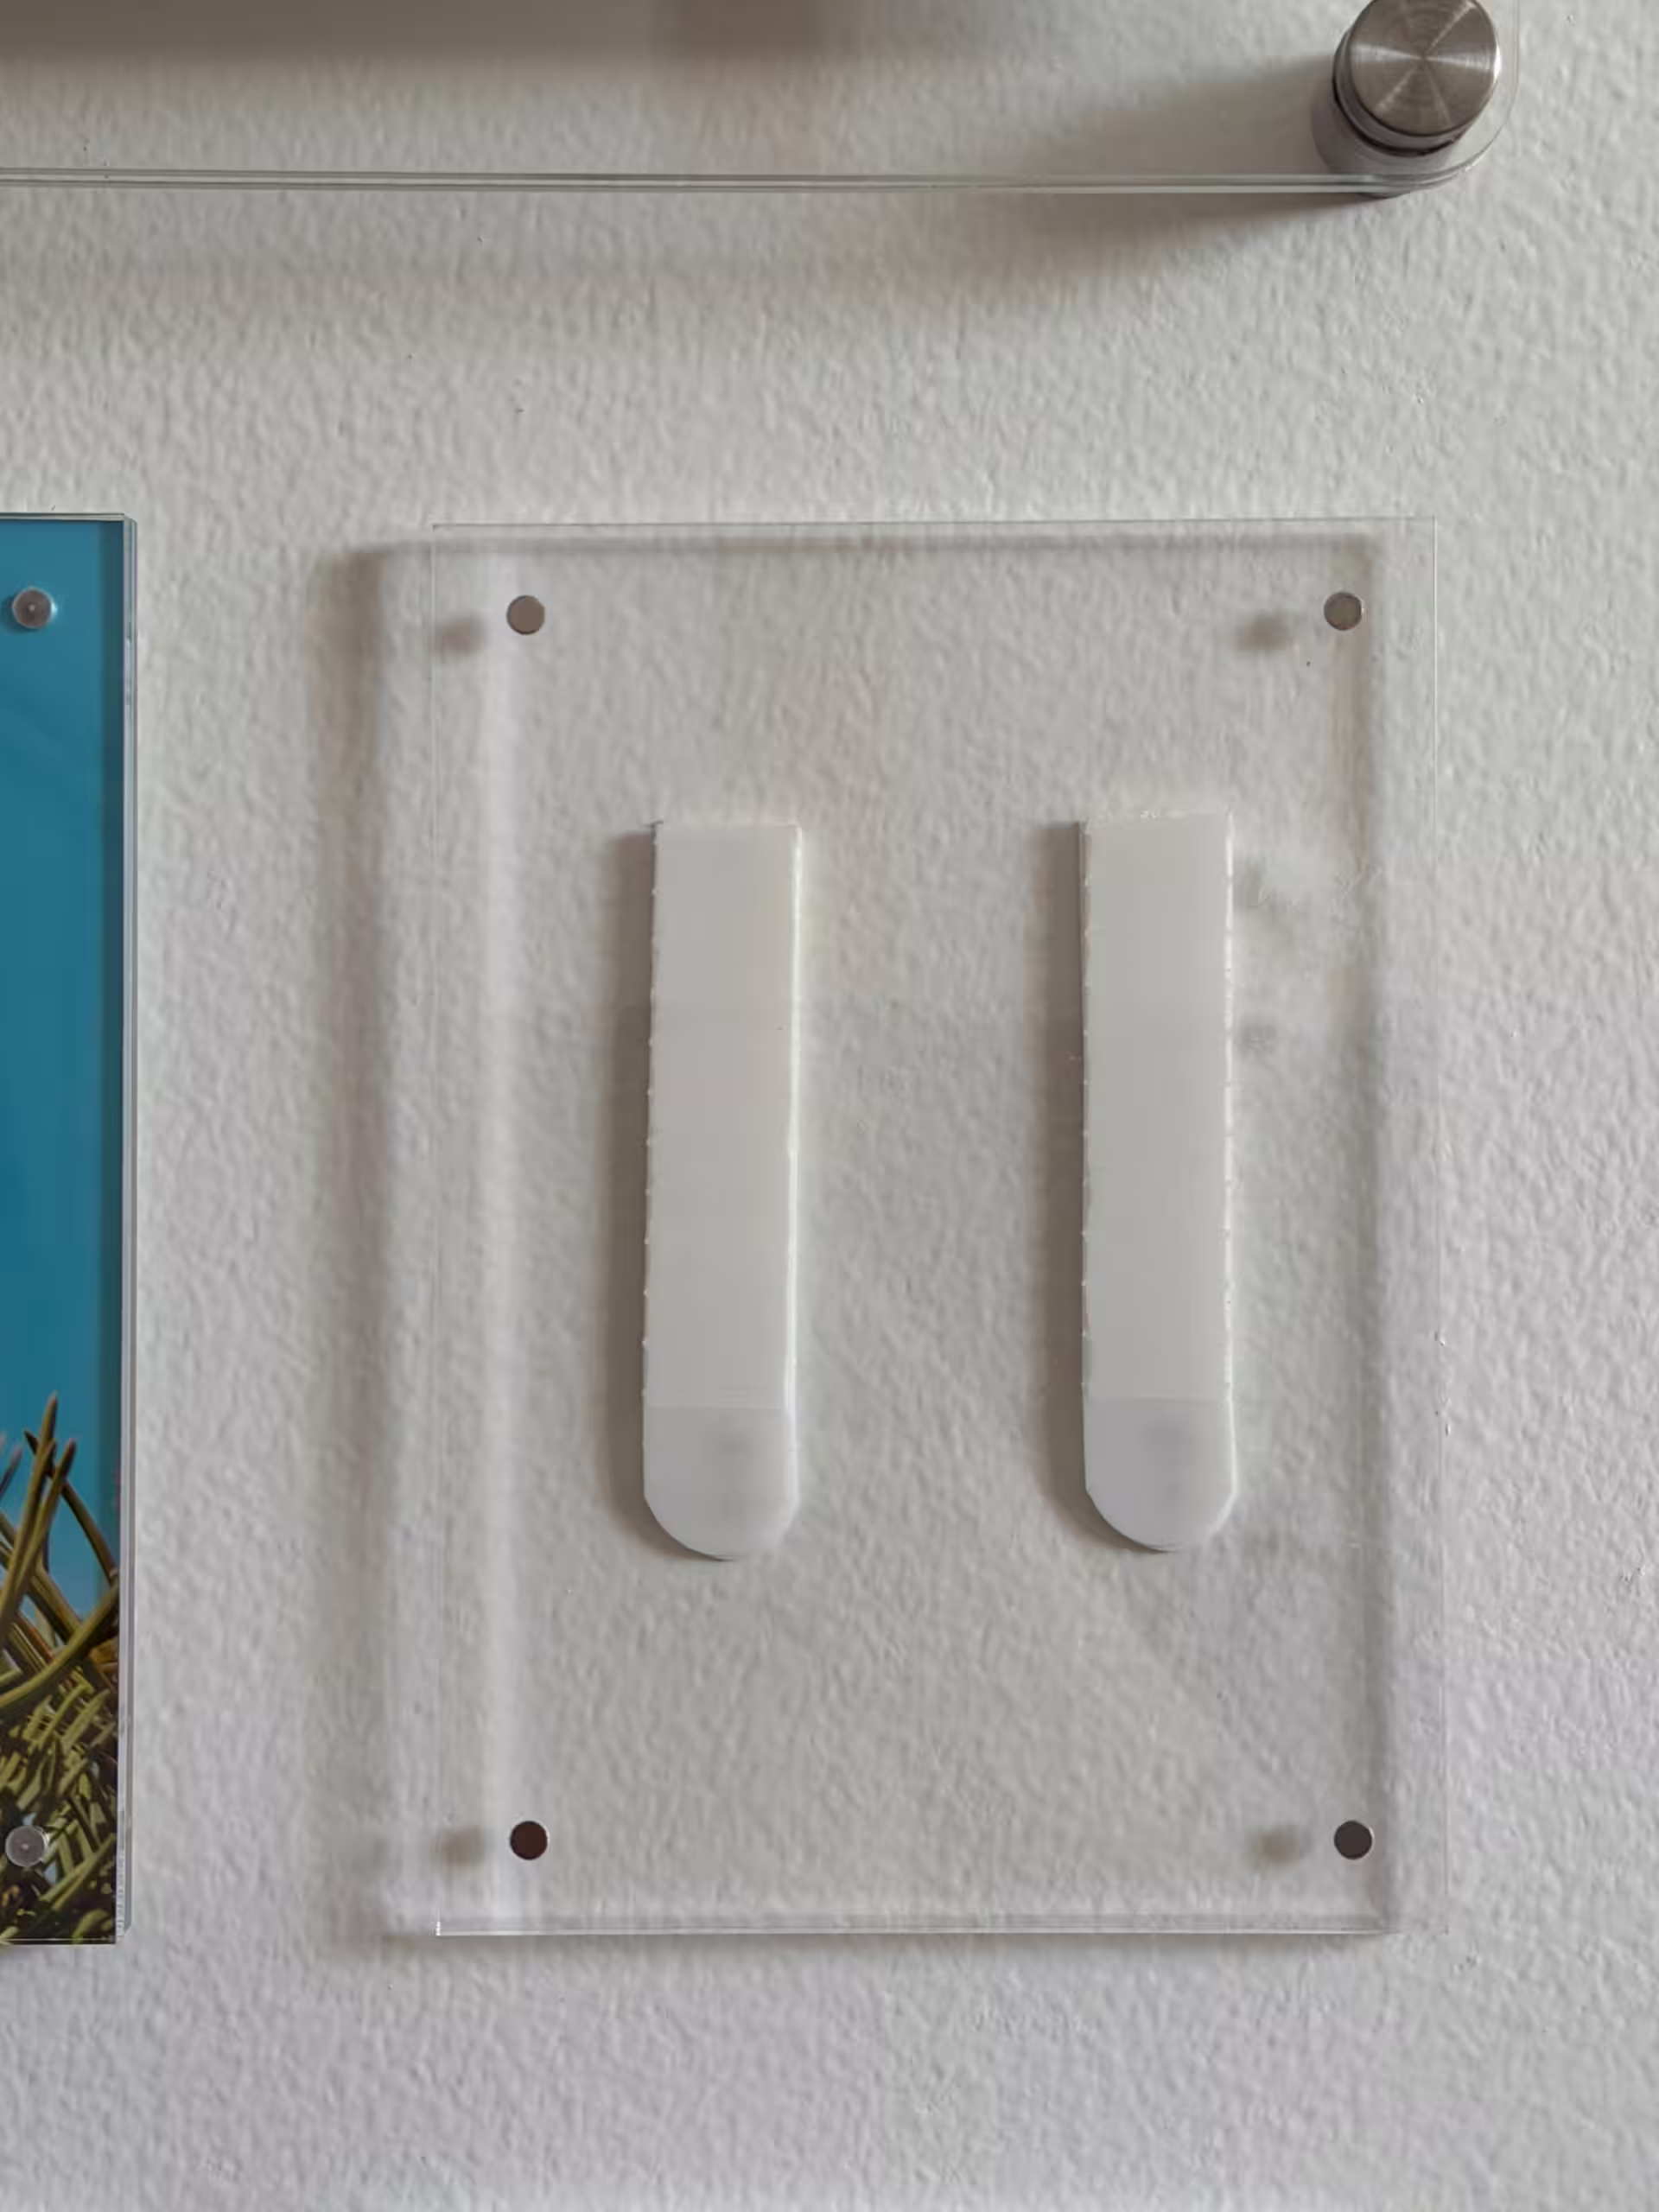
The mini magnetic frames are where this system really shines. I mounted them using Command Strips — no holes, no stress, and easy removal.
For the medium and large frames, drilling is required only once. The frames include drywall anchors, and their installation video provides helpful mounting guidance.
For printing, I use pearl photo paper for its depth and low glare. I’ve consistently had excellent results from Nations Photo Lab, and I’m proud to now be an affiliate partner with them. If you decide to try them, you can use code FEATHERQUEST20 for 20% off your order.
Floating Acrylic Frame – 5"x7" (10 Pack)
Perfect for supporting images around the main centerpiece. These attach magnetically and can be removed or swapped in seconds. No drilling required when paired with Command Strips.
The anchor of the entire wall. This is where your hero image lives. Requires drilling once, but the frame includes drywall anchors and installs easily with a level.
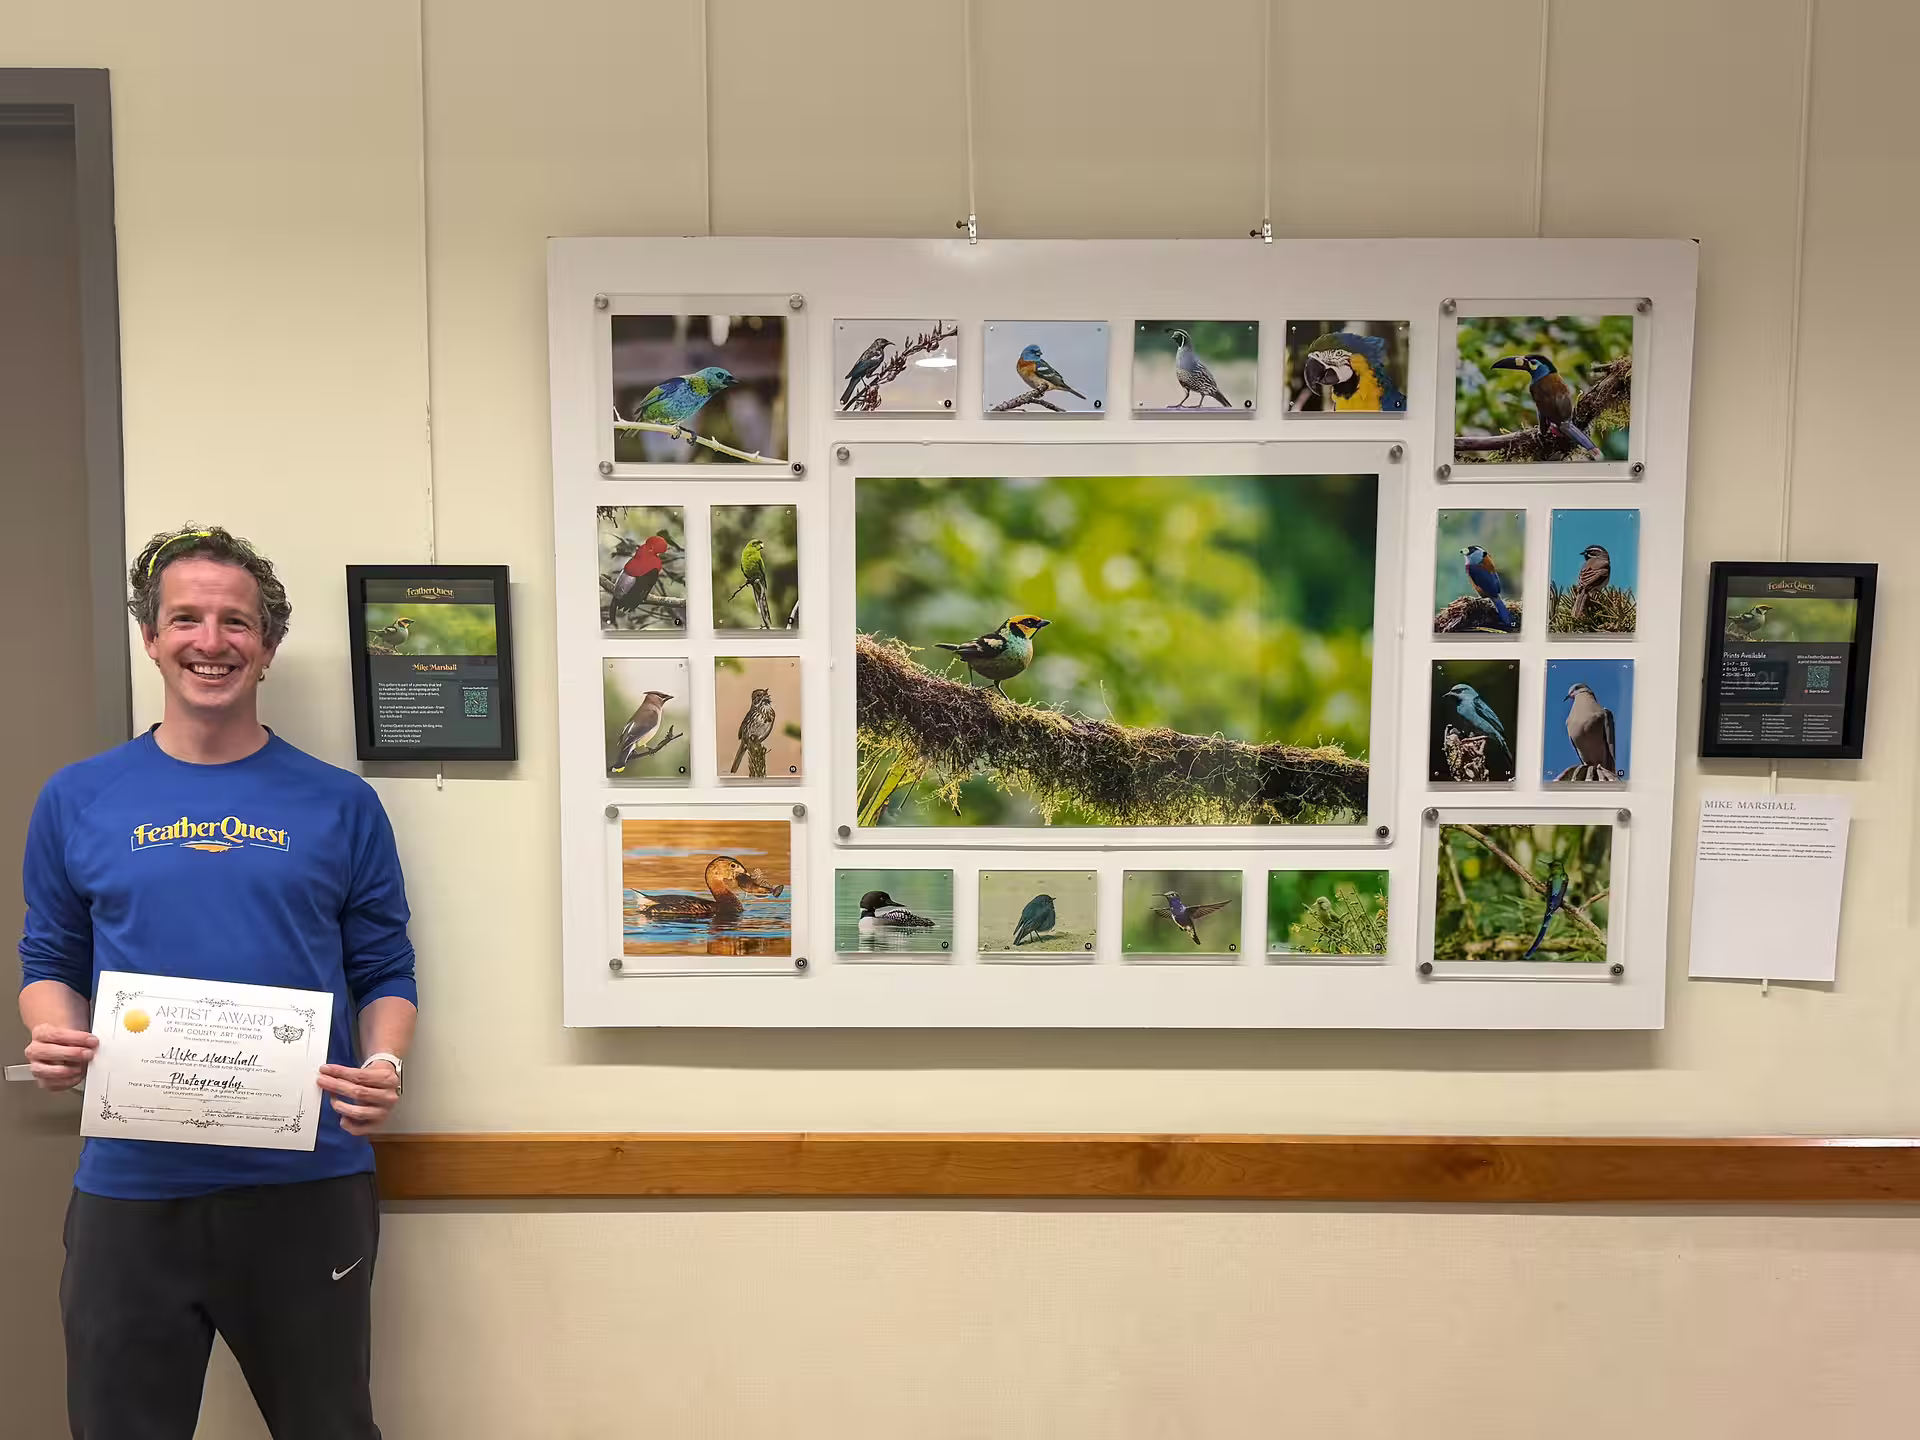
After building the permanent wall, I wanted to take the same idea into a public space — without drilling into walls. The goal was simple: keep the same clean, fixed layout, but make it portable.
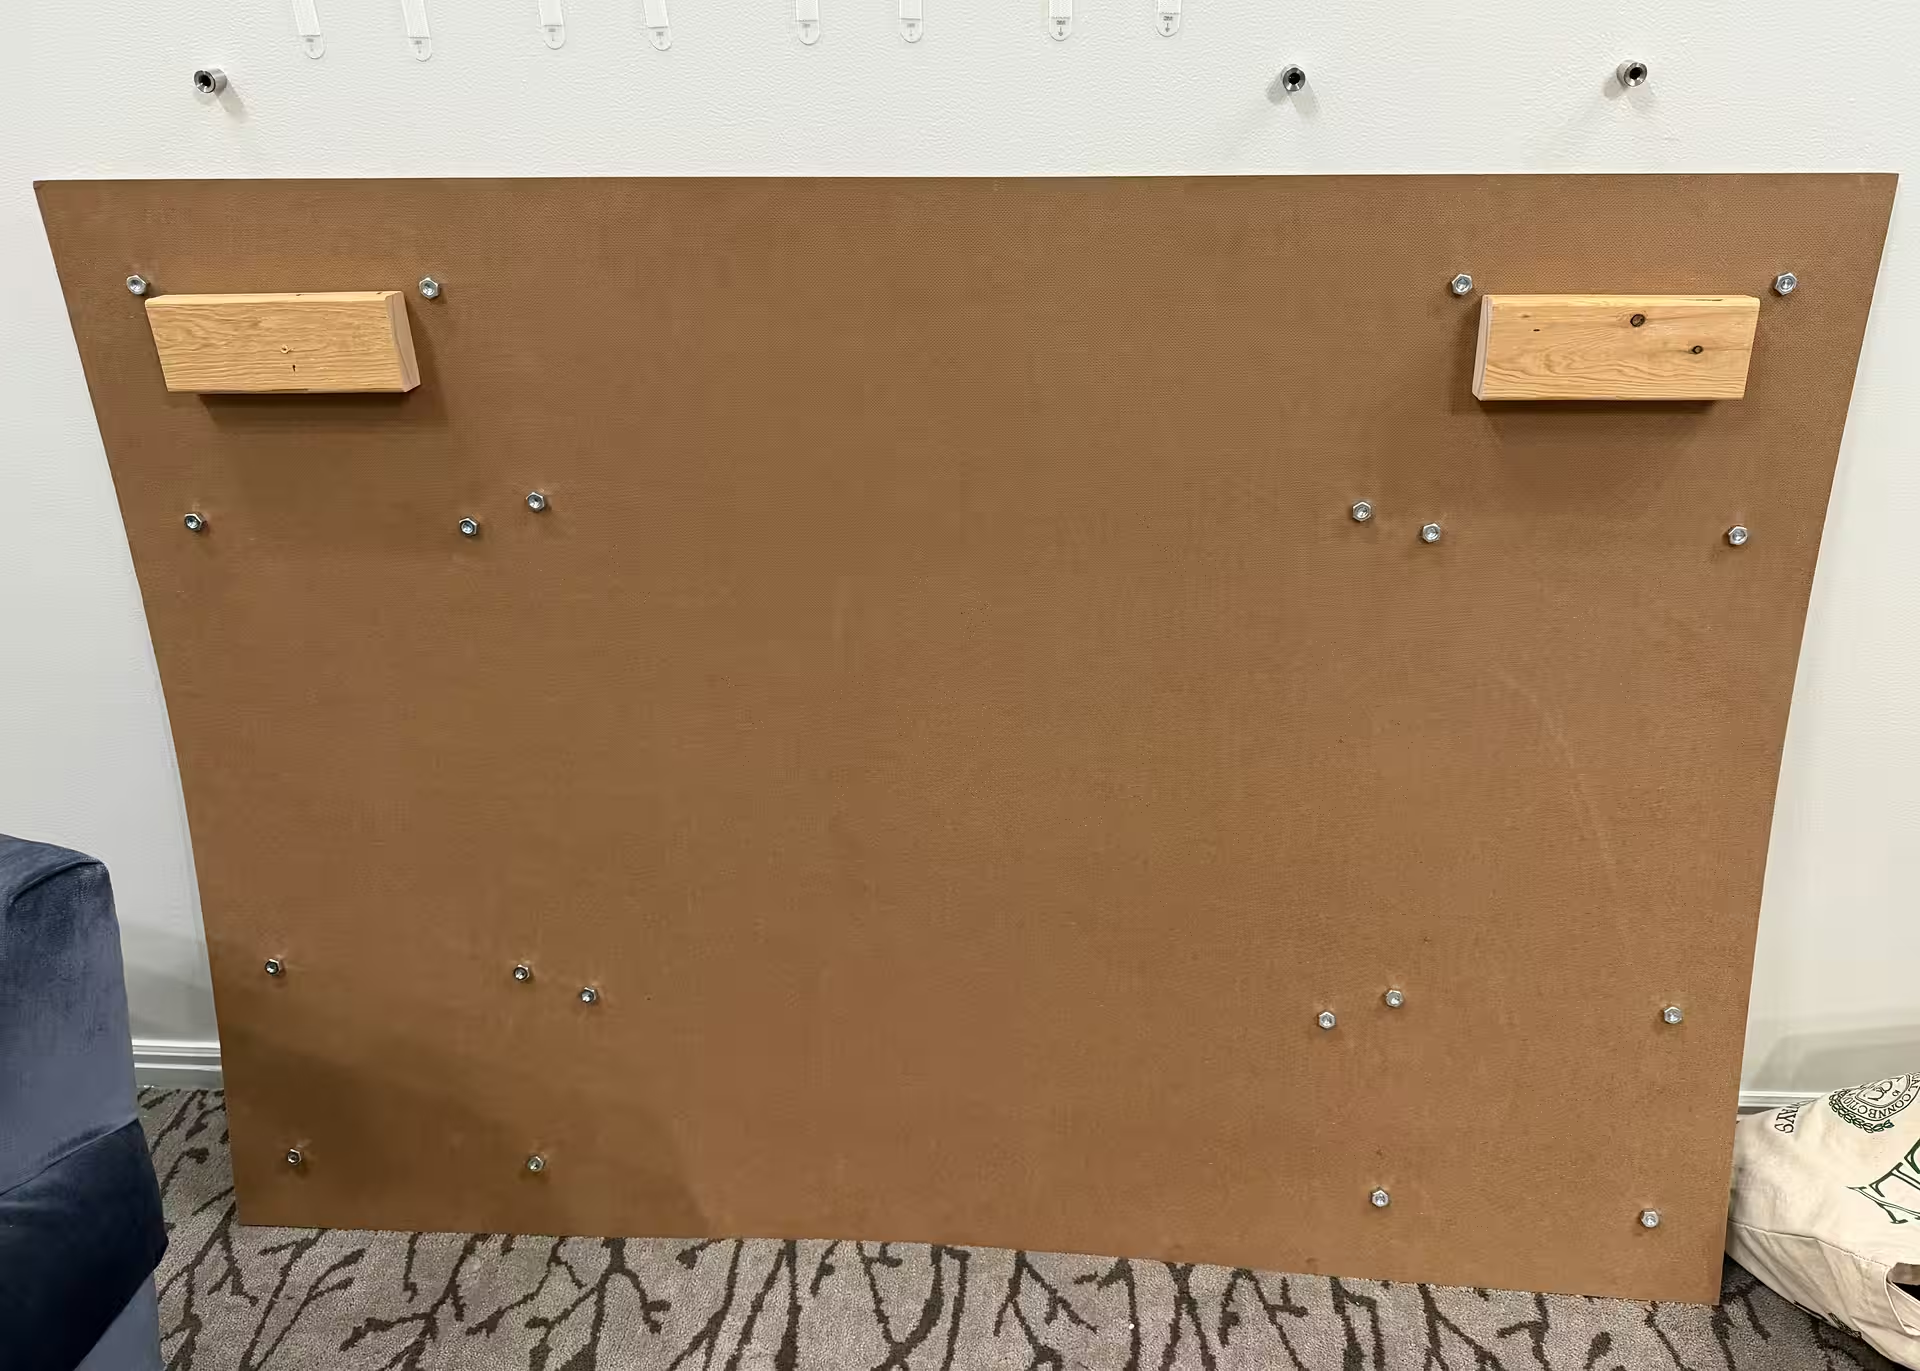
I mounted the entire layout onto a single artboard, recreating the same structure from the wall. The frames attach the same way, but now the whole system can be moved and displayed anywhere.
Building the ArtboardThe same structure, mounted to a portable backing so the entire gallery can move as one piece.
One thing I learned quickly: I should have run a single 2x4 across the entire width instead of using two smaller blocks. I also added two support blocks at the bottom to keep the board from tipping forward once it was hanging.
Installed ExhibitThe portable version of the wall, displayed as a public exhibit.
This portable version is now part of a live exhibit. You can see it in action and explore the full gallery here:
This wall is permanent — the art isn’t. That’s the magic.
Bird photography evolves fast. Better photos replace older ones. Seasons change. Stories shift. This system lets the wall grow with the journey instead of locking it in place.
If you love rotating your photos as much as taking them, this setup is worth every minute.
If you’re interested in the camera gear behind many of the photos shown here, you can explore my full Bird Photography Gear Guide for a deeper look.
Installation & Setup Gallery
Level Before Locking InUsing a long level across the standoff bolts ensures the frame mounts straight before tightening everything down.Installation in ProgressThe center frame goes up first, followed by the surrounding frames using consistent spacing.Magnetic Mini FramesThe smaller frames mount with Command Strips, allowing quick swaps without new holes.Mini Gallery LayoutA small, budget-friendly option that uses the same spacing principles in a compact footprint.Bird Photography Gallery TemplateDesigned for rotating bird photos over time while keeping the wall structure fixed.Family Canvas Gallery LayoutThe same layout principles work beautifully for family portraits and travel memories.